Highly separated Talos Kubernetes Cluster: Part 3 - Registry installation

Welcome back to another part of building an highly separated Talos Kubernetes cluster! In this part we will install the internal registry which avoids the direct connection to the internet for the Talos cluster. Furthermore, the Talos image factory will be hosted on premise too, which allows us to create Talos boot images with own secure-boot key locally.
All installation steps in this post will be taken on the registry host!
Install Docker
Harbor is going to be installed as a Docker container. Thus, we need to install Docker first on the Registry host. I'm using the official Docker guide for the installation.
Add the repository:
sudo apt update
sudo apt install ca-certificates curl
sudo install -m 0755 -d /etc/apt/keyrings
sudo curl -fsSL https://download.docker.com/linux/ubuntu/gpg -o /etc/apt/keyrings/docker.asc
sudo chmod a+r /etc/apt/keyrings/docker.asc

sudo tee /etc/apt/sources.list.d/docker.sources <<EOF
Types: deb
URIs: https://download.docker.com/linux/ubuntu
Suites: $(. /etc/os-release && echo "${UBUNTU_CODENAME:-$VERSION_CODENAME}")
Components: stable
Signed-By: /etc/apt/keyrings/docker.asc
EOF

sudo apt update
Install the necessary packages:
sudo apt install docker-ce docker-ce-cli containerd.io docker-buildx-plugin docker-compose-pluginVerify that Docker is up and running:
sudo systemctl status docker

# if it isn't running start it
sudo systemctl start docker
Add the ubuntu user to the docker group (you have to re-login afterwards):
sudo usermod -a -G docker ubuntuCreate self-signed certificates
To communicate through https between Talos and the registry we're going to use self-signed certificates:
mkdir $HOME/certs && cd $HOME/certs

# generate the CA private key
openssl genrsa -out ca.key 4096

# generate the CA certificate
openssl req -x509 -new -nodes -sha512 -days 3650 -subj "/C=CN/ST=NA/L=NA/O=homelab/OU=PKI/CN=HOMELAB CA" -key ca.key -out ca.crt

# generate the server certificate private key
openssl genrsa -out registry.mgmt.lab.internal.key 4096

# generate server certificate signing request
openssl req -sha512 -new -subj "/C=CN/ST=NA/L=NA/O=homelab/OU=PKI/CN=registry.mgmt.lab.internal" -key registry.mgmt.lab.internal.key -out registry.mgmt.lab.internal.csr

# generate an x509 v3 extension file
cat > v3.ext <<-EOF
authorityKeyIdentifier=keyid,issuer
basicConstraints=CA:FALSE
keyUsage = digitalSignature, nonRepudiation, keyEncipherment, dataEncipherment
extendedKeyUsage = serverAuth
subjectAltName = @alt_names

[alt_names]
DNS.1=registry.mgmt.lab.internal
DNS.2=registry.mgmt.lab
DNS.3=registry
EOF

# generate the server certificate
openssl x509 -req -sha512 -days 3650 -extfile v3.ext -CA ca.crt -CAkey ca.key -CAcreateserial -in registry.mgmt.lab.internal.csr -out registry.mgmt.lab.internal.crt

# copy certificates and keys to own directory for Harbor installation
sudo mkdir -p /data/cert && sudo cp registry.mgmt.lab.internal.crt registry.mgmt.lab.internal.key /data/cert/
Installing Harbor registry
Download and extract the latest Harbor offline installer from https://github.com/goharbor/harbor/releases
wget https://github.com/goharbor/harbor/releases/download/v2.14.2/harbor-offline-installer-v2.14.2.tgz
tar xzvf harbor-offline-installer-v2.14.2.tgz
Next we have to configure Harbor through the harbor.yml file:
hostname: registry.mgmt.lab.internal
https:
  port: 443
  certificate: /data/cert/registry.mgmt.lab.internal.crt
  private_key: /data/cert/registry.mgmt.lab.internal.key

harbor_admin_password: Harbor12345

database:
  password: root123
  max_idle_conns: 100
  max_open_conns: 900
  conn_max_lifetime: 5m
  conn_max_idle_time: 0

data_volume: /data

jobservice:
  max_job_workers: 10
  max_job_duration_hours: 24
  job_loggers:
    - STD_OUTPUT
    - FILE
  logger_sweeper_duration: 1 #days

notification:
  webhook_job_max_retry: 3
  webhook_job_http_client_timeout: 3 #seconds

log:
  level: info
  local:
    rotate_count: 50
    rotate_size: 200M
    location: /var/log/harbor

#This attribute is for migrator to detect the version of the .cfg file, DO NOT MODIFY!
_version: 2.14.0

upload_purging:
  age: 168h
  interval: 24h
  dryrun: false

cache:
  enabled: false
  expire_hours: 24
Finally, we can install the Harbor registry using the offline installer:
cd harbor && sudo ./install.sh
If everything went fine you should see the docker container running with docker ps:

Go to https://registry.mgt.lab.internal and you should see the administration interface:
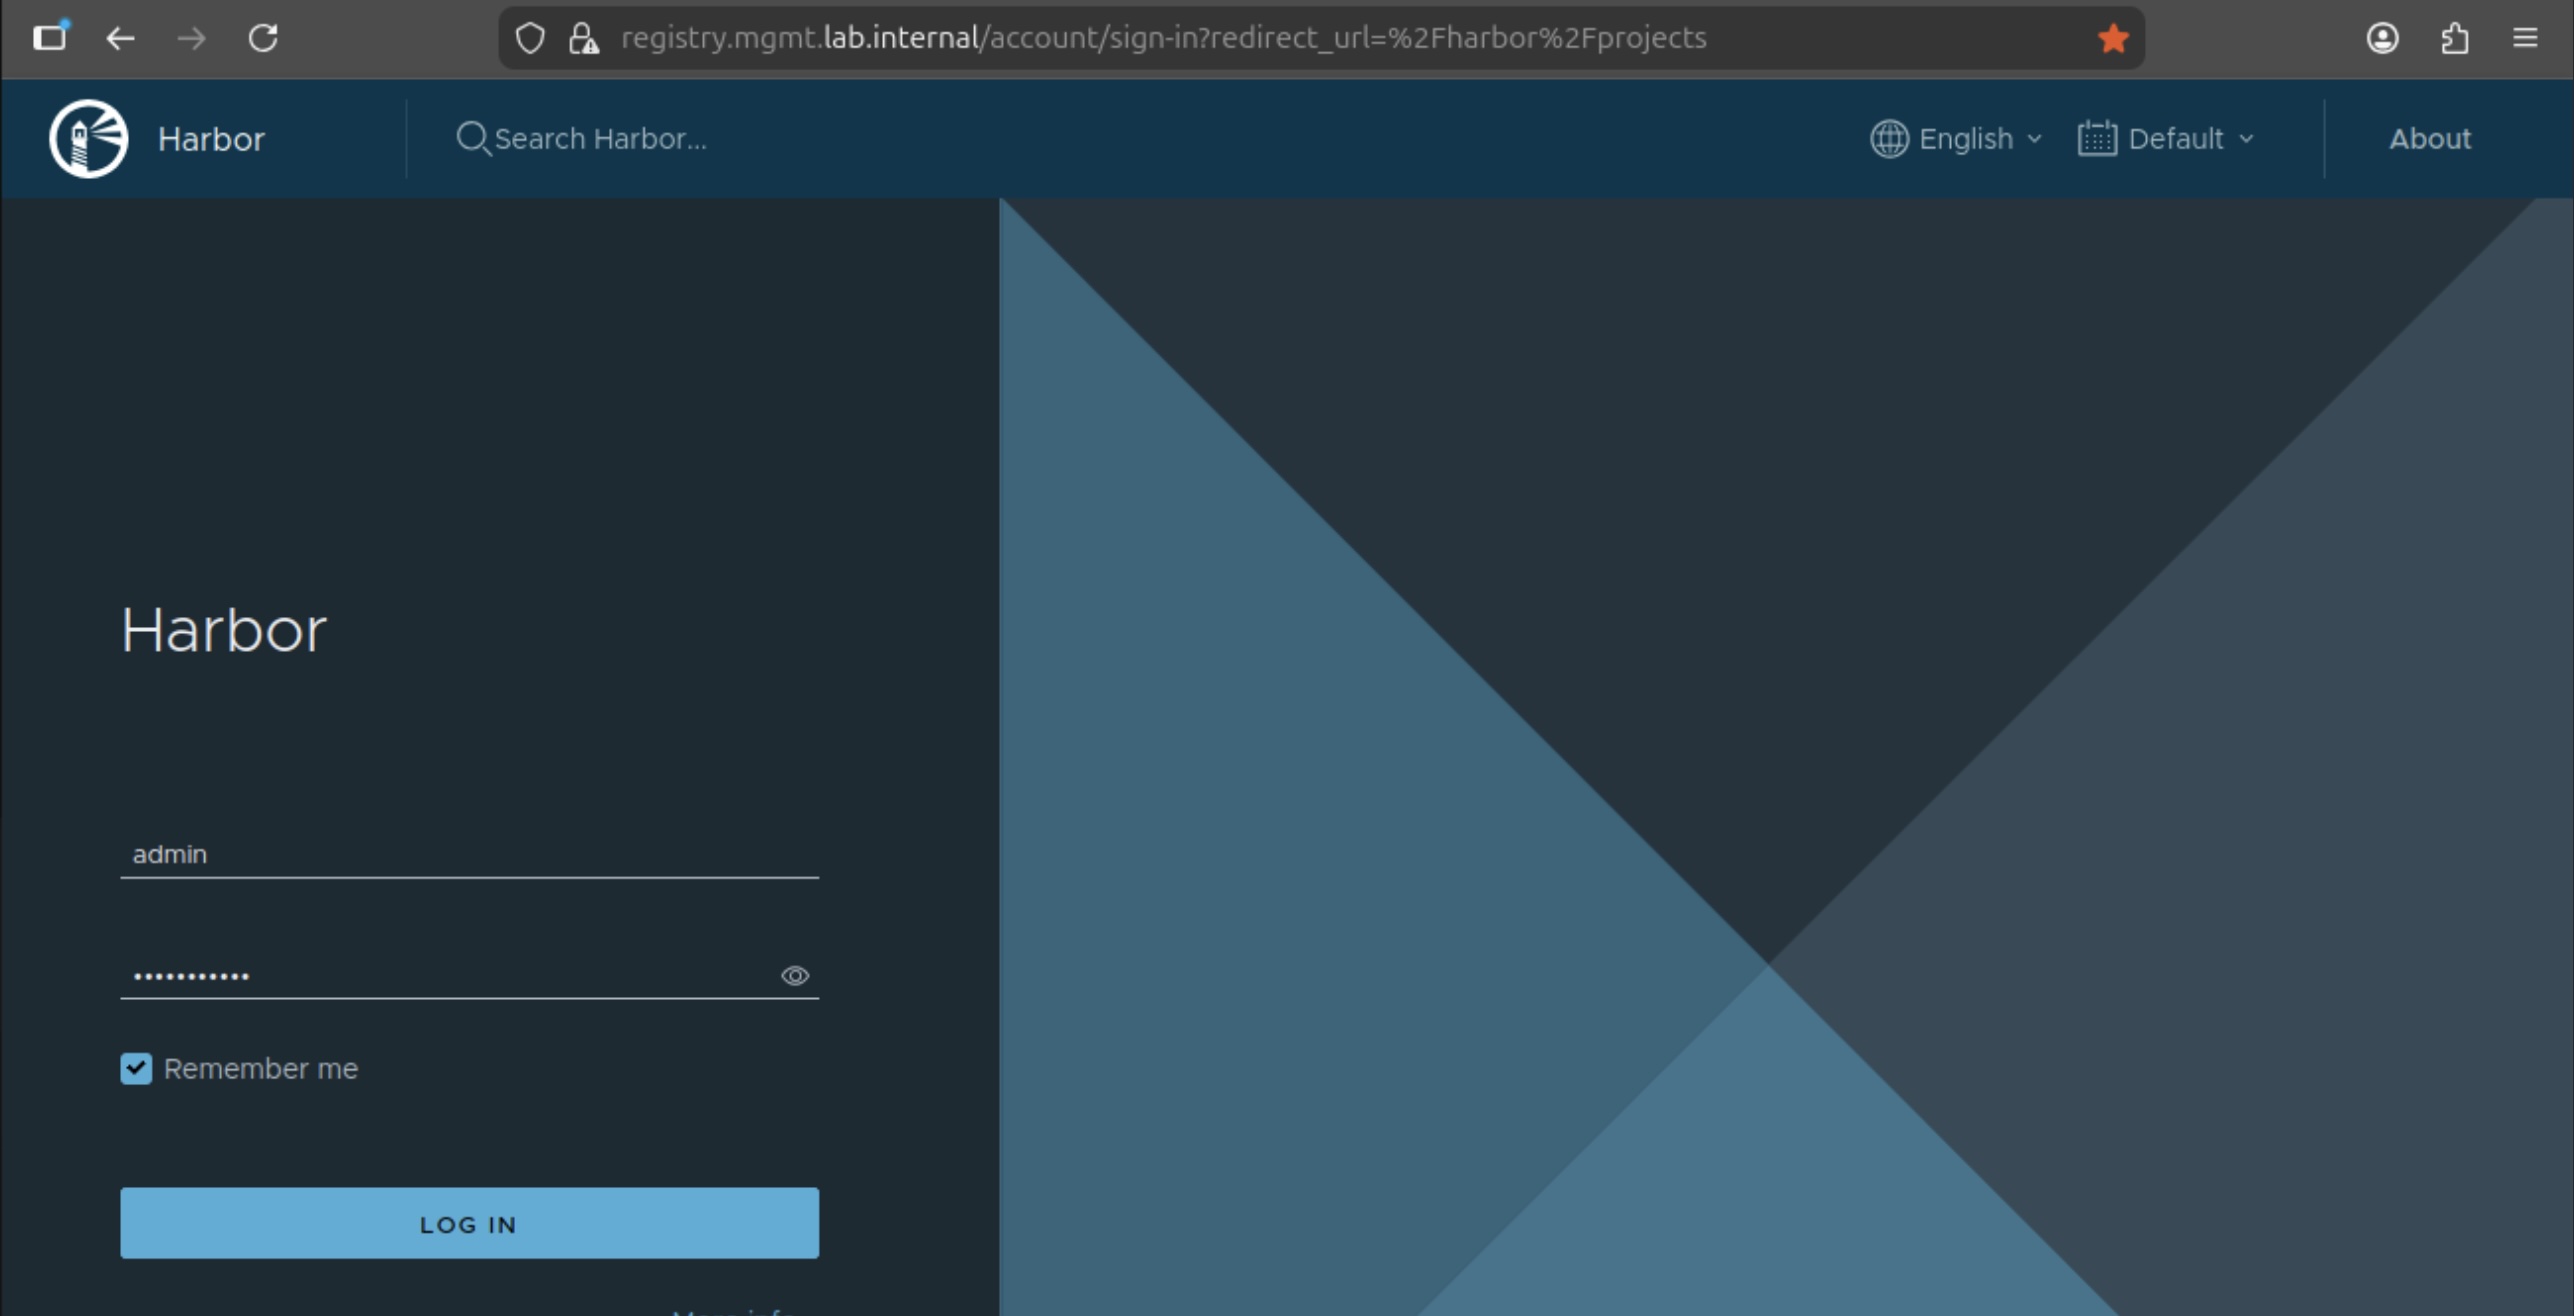
The password is the same as from the harbor.yaml
Be aware that on a reboot you have to manually start the service with docker compose in the harbor directory. If you like to autostart the service, install the systemd service file from https://github.com/goharbor/harbor/blob/main/tools/systemd/harbor.service and copy the docker compose file to /etc/goharbor/harbor/docker-compose.yml
Configure proxy caches
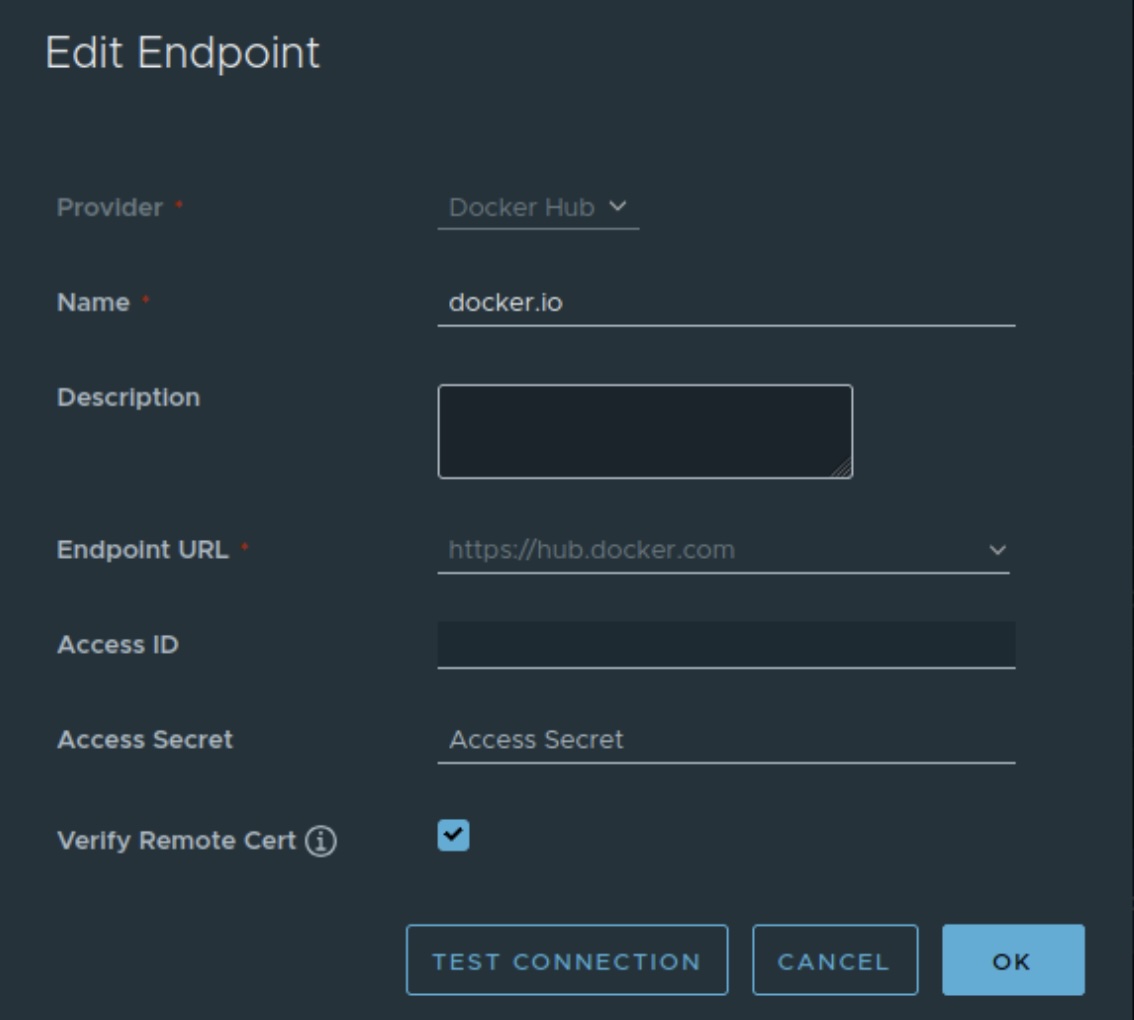
With the running Harbor registry we can create the needed proxy caches for Talos. The following registries have to be configured:
Provider: Docker Hub
Name: docker.io
Endpoint Url: https://hub.docker.com
Access ID: leave empty
Access Secret: leave empty
Verify Remote Cert: Checked
Provider: Docker Registry
Name: gcr.io
Endpoint Url: https://gcr.io
Access ID: leave empty
Access Secret: leave empty
Verify Remote Cert: Checked
Provider: Docker Registry
Name: quay.io
Endpoint Url: https://quay.io
Access ID: leave empty
Access Secret: leave empty
Verify Remote Cert: Checked
Provider: Docker Registry
Name: registry.k8s.io
Endpoint Url: https://registry.k8s.io
Access ID: leave empty
Access Secret: leave empty
Verify Remote Cert: Checked
Provider: Github GHCR
Name: ghcr.io
Endpoint Url: https://ghcr.io
Access ID: leave empty
Access Secret: leave empty
Verify Remote Cert: Checked
In the gui it looks like this:
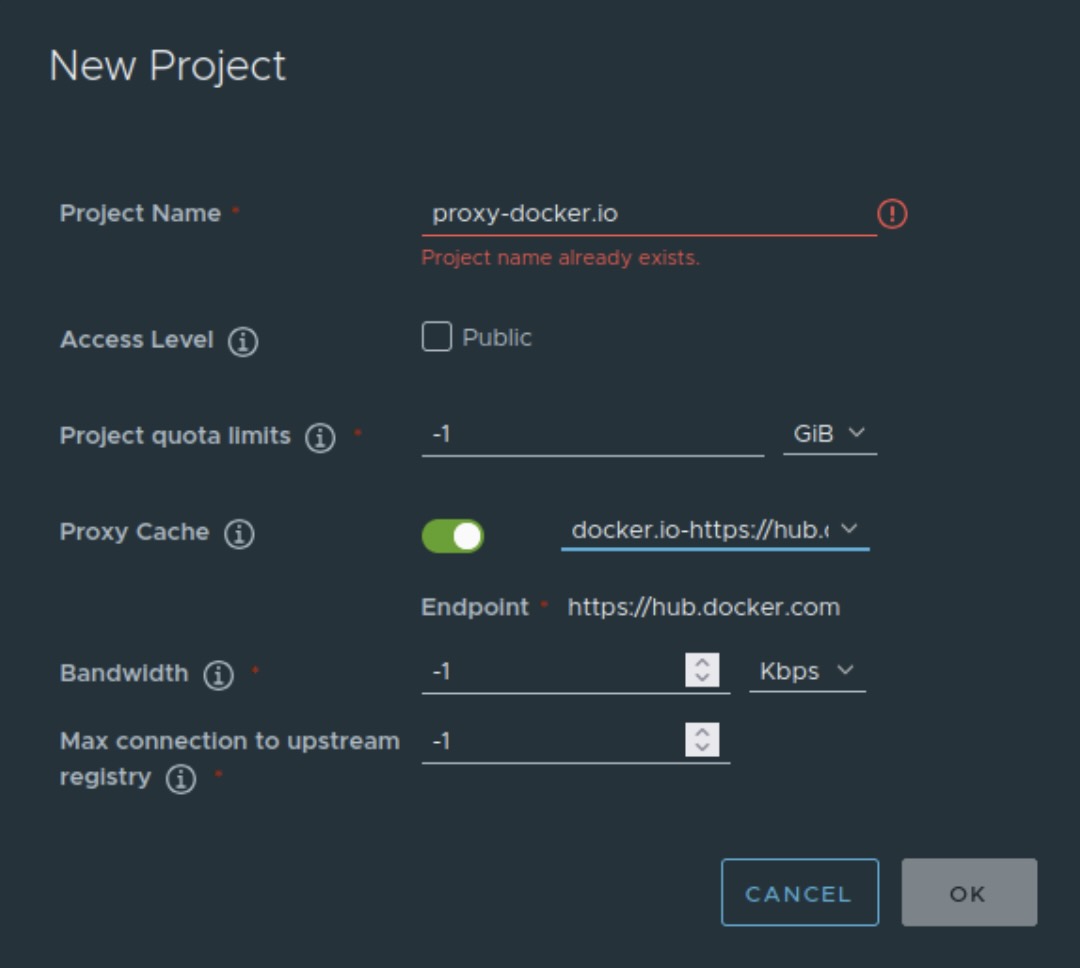
Afterwards we're mapping the repositories as proxy cache. Go to the projects tab and click on "New project". Fill out the name with prefix "proxy-". Set the Access Level to public to avoid authentication from the Talos nodes and select the right repository in Proxy Cache. Repeat this step for all available repositories you created.
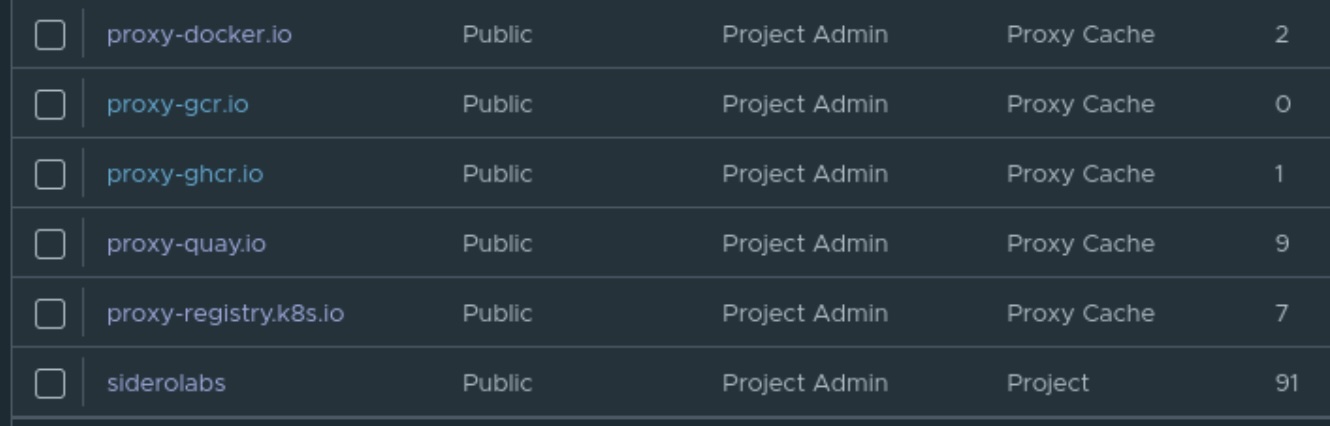
Additionally, we need a "siderolabs" project for the Talos Image factory. This is setup as a plain project without a Proxy Cache. Still Public as the other ones. Finally, the projects should look like this:
Installing Talos Image Factory
The image factory is needed to create an boot image locally with your own secure boot keys. Talos has a own dedicated service for this too, but for this blog series we're going fully on premise for the bootstrap images.
Prerequisites
- Crane
- Signing Key for co signing:
openssl ecparam -name prime256v1 -genkey -noout -out signing-key.key - Talosctl on the Management Client
Get the Talos image list and copy the txt file from the management to the registry host:
talosctl image talos-bundle v1.12.1 > images.txtCopy the necessary images from siderolabs to internal registry with the following script:
REGISTRY_ENDPOINT=registry.mgmt.lab.internal
crane auth login ${REGISTRY_ENDPOINT} -u admin -p Harbor12345
for SOURCE_IMAGE in $(cat images.txt)
  do
    IMAGE_WITHOUT_DIGEST=${SOURCE_IMAGE%%@*}
    IMAGE_WITH_NEW_REG="${REGISTRY_ENDPOINT}/${IMAGE_WITHOUT_DIGEST#*/}"
    crane --insecure copy \
      $SOURCE_IMAGE \
      $IMAGE_WITH_NEW_REG
done
Create cosign key with:
sudo docker run --rm -it \
-v $PWD:/keys -w /keys \
-e COSIGN_PASSWORD="" \
--user $(id -u):$(id -g) \
ghcr.io/sigstore/cosign/cosign:v2.6.1 \
generate-key-pair
Sign Images:
KEY_FILE="cosign.key"
REGISTRY_ENDPOINT=registry.mgmt.lab.internal
crane auth login ${REGISTRY_ENDPOINT} -u admin -p Harbor12345

for IMAGE in $(cat images.txt)
  do
    NEW_IMAGE="${REGISTRY_ENDPOINT}/${IMAGE#*/}"
    if [[ "$NEW_IMAGE" != *"@sha256:"* ]]; then
      NEW_IMAGE="${NEW_IMAGE}@$(crane --insecure digest $NEW_IMAGE)"
    fi
    docker run --rm -it --net=host \
      -v $PWD:/keys -w /keys \
      -v $HOME/.docker/config.json:/.docker/config.json:ro \
      -e DOCKER_CONFIG=/.docker \
      -e COSIGN_PASSWORD="" \
      -e COSIGN_YES=true \
      --user $(id -u):$(id -g) \
      docker.io/bitnami/cosign:latest \
        sign \
	--allow-insecure-registry \
	--key /keys/$KEY_FILE \
        --tlog-upload=false \
	--use-signing-config=false \
	--new-bundle-format=false \
        $NEW_IMAGE
done
Generate SecureBoot keys/certs with:
talosctl gen secureboot pcr (PCR Key)
talosctl gen secureboot uki --common-name "SecureBoot Key" (Signing Key and Cert)
copy the pcr-signing-key.pem, uki-signing-key.pem and uki-signing-cert.pem to the registry host
Create the configuration for the Talos image factory with a env.yml file:
#env.yml
artifacts:
    core:
        components:
            extensionManifest: siderolabs/extensions
            imager: siderolabs/imager
            installer: siderolabs/installer
            installerBase: siderolabs/installer-base
            overlayManifest: siderolabs/overlays
            talosctl: siderolabs/talosctl-all
        insecure: false
        registry: registry.mgmt.lab.internal
    installer:
        external:
            insecure: false
            namespace: ""
            registry: ""
            repository: ""
        internal:
            insecure: false
            namespace: siderolabs
            registry: registry.mgmt.lab.internal
            repository: ""
    refreshInterval: 5m0s
    schematic:
        insecure: false
        namespace: siderolabs/image-factory
        registry: registry.mgmt.lab.internal
        repository: schematics
    talosVersionRecheckInterval: 15m0s
build:
    maxConcurrency: 6
    minTalosVersion: 1.2.0
cache:
    cdn:
        enabled: false
        host: ""
        trimPrefix: ""
    oci:
        insecure: false
        namespace: siderolabs/image-factory
        registry: registry.mgmt.lab.internal
        repository: cache
    s3:
        bucket: image-factory
        enabled: false
        endpoint: ""
        insecure: false
        region: ""
    signingKeyPath: "/signing-key.key"
containerSignature:
    disabled: false
    issuer: https://accounts.google.com
    issuerRegExp: ""
    publicKeyFile: "/cosign.pub"
    publicKeyHashAlgo: sha256
    subjectRegExp: '@siderolabs\.com$'
http:
    allowedOrigins:
        - '*'
    certFile: "/certs/server-chain.pem"
    externalPXEURL: ""
    externalURL: https://registry.mgmt.lab.internal:9443/
    httpListenAddr: :8080
    keyFile: "/certs/server-key.pem"
metrics:
    addr: :2122
secureBoot:
    awsKMS:
        certARN: ""
        certPath: ""
        keyID: ""
        pcrKeyID: ""
        region: ""
    azureKeyVault:
        certificateName: ""
        keyName: ""
        url: ""
    enabled: true
    file:
        pcrKeyPath: "./pcr-signing-key.pem"
        signingCertPath: "./uki-signing-cert.pem"
        signingKeyPath: "./uki-signing-key.pem"
Start Talos Image Factory with docker-compose:
services:
  image-factory:
    image: "ghcr.io/siderolabs/image-factory:v1.0.0-beta.0"
    restart: unless-stopped
    container_name: image-factory
    ports:
      - "9443:8080"
    volumes:
      - $HOME/.docker/config.json:/.docker/config.json
      - ./env.yaml:/env.yaml
      - ./pcr-signing-key.pem:/pcr-signing-key.pem
      - ./uki-signing-key.pem:/uki-signing-key.pem
      - ./uki-signing-cert.pem:/uki-signing-cert.pem
      - ./signing-key.key:/signing-key.key
      - ./cosign.pub:/cosign.pub
      # CA cert for Habor verification
      - ./ca.crt:/etc/pki/tls/cacert.pem
      - /data/cert/registry.mgmt.lab.internal.key:/certs/server-key.pem
      - /data/cert/registry.mgmt.lab.internal.crt:/certs/server-chain.pem
    command:
      --config env.yaml
Generate the bootstrap image
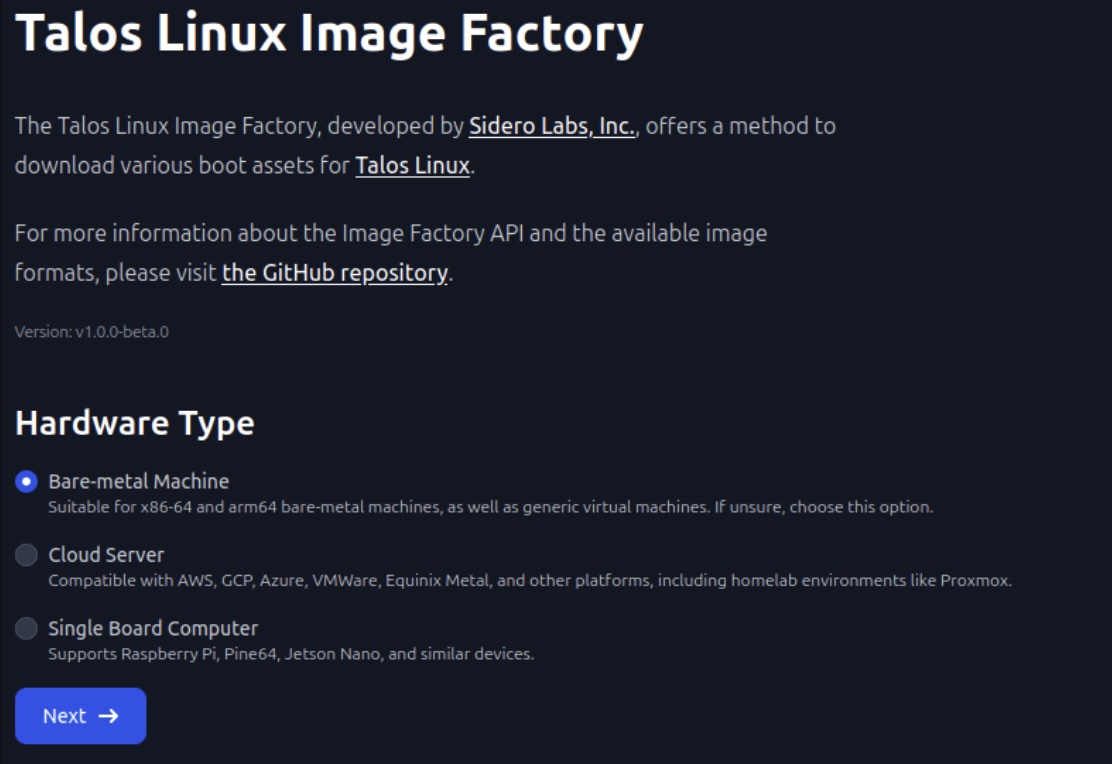
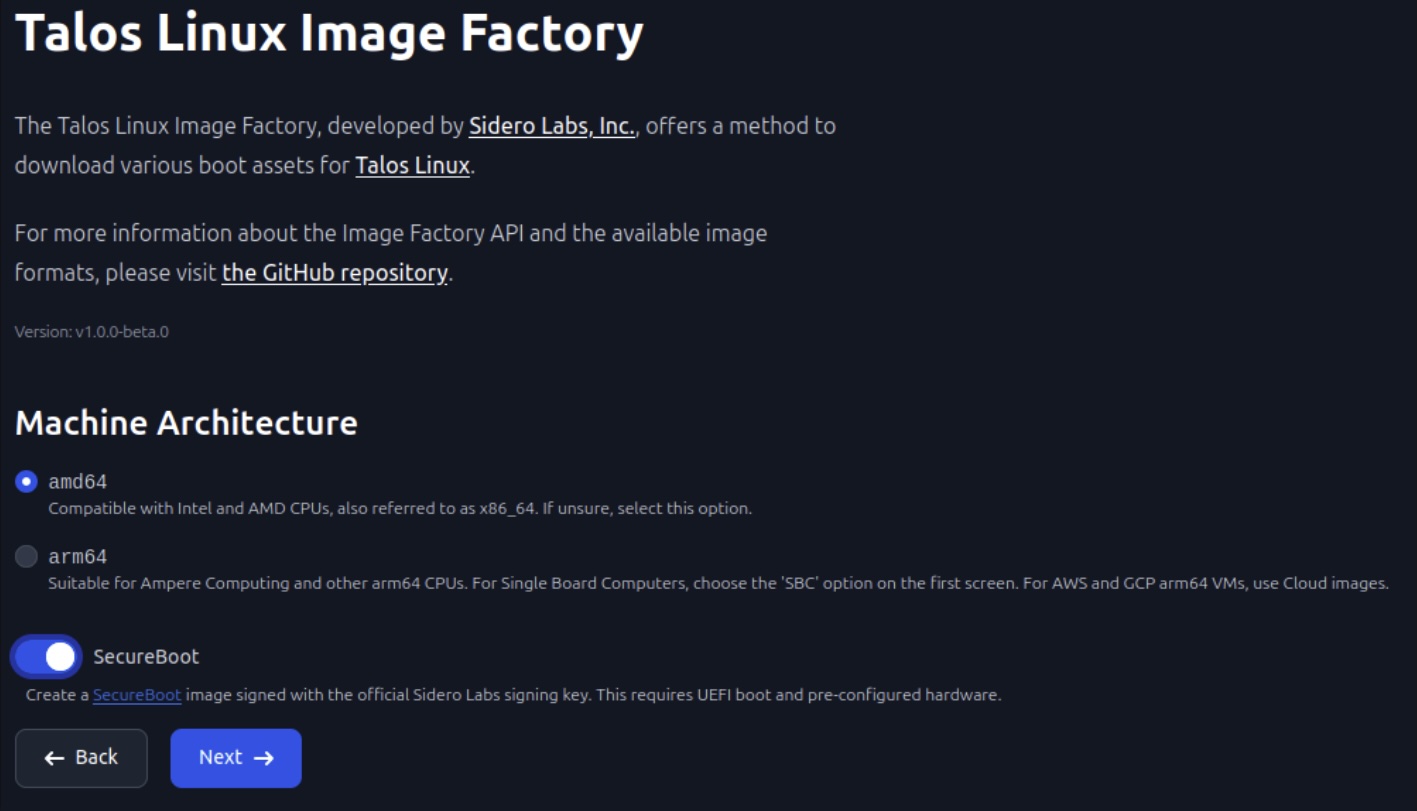
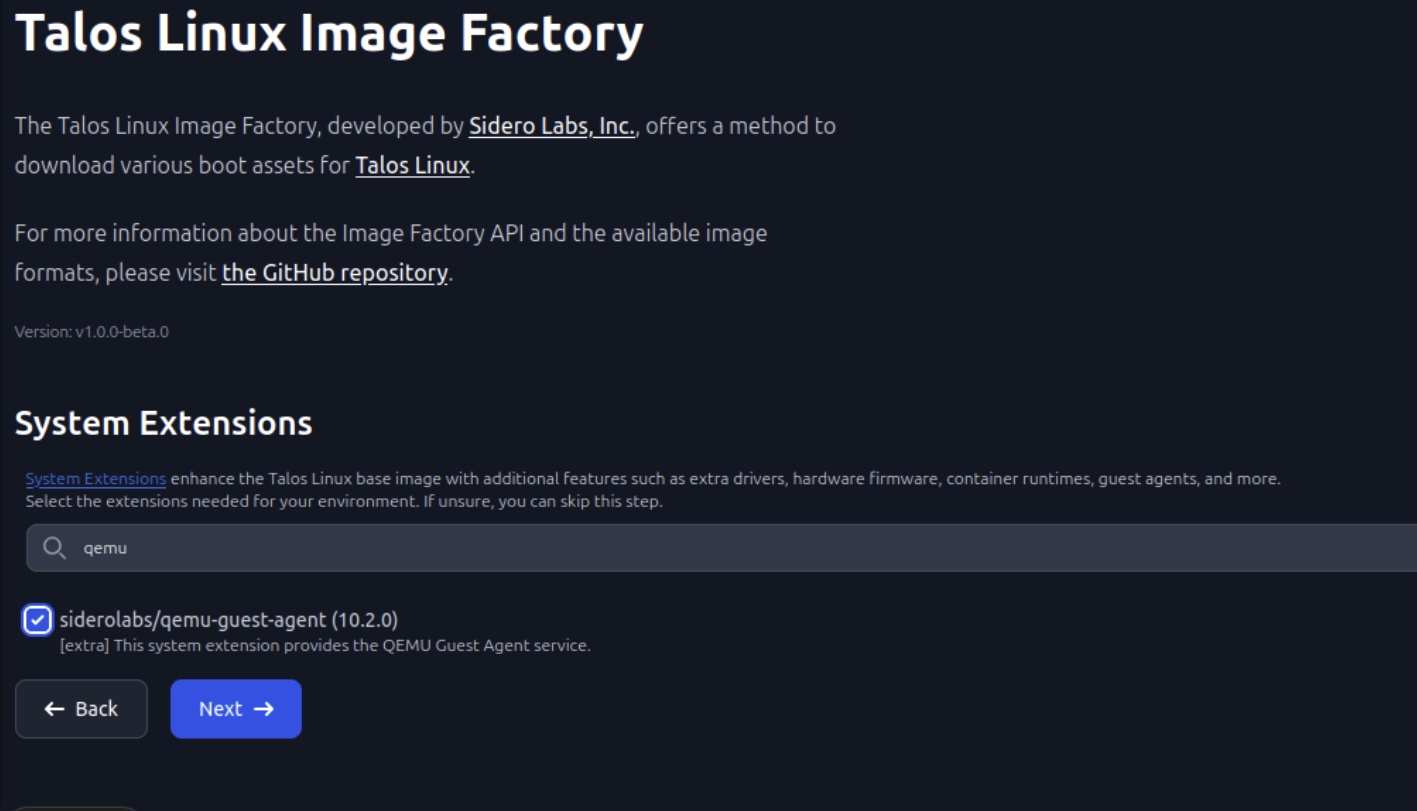
Go to https://registry.mgmt.lab.internal:9443 and set the following options:
Upload the image as proxmox iso image. We're going to use that to bootstrap the Talos cluster in the next session

Summary
We now have a running registry using Harbor and a Talos Image Factory on premise to create local Talos bootstrap images with a own secure boot key. In the next post we will configure and install the Talos cluster.
That's all for now. Stay tuned and leave me a comment on LinkedIn for any problems or suggestions you have.
Related posts:
You should also read:

Highly separated Talos Kubernetes Cluster: Part 4 - Talos Cluster installation
In this part, we install Talos on Proxmox VMs, bootstrap the cluster, enable networking with Calico, and prepare HAProxy Ingress in external mode. Before starting, make sure you already read through the other blog posts of this series: Before we can install the Talos cluster…
Continue reading...
Highly separated Talos Kubernetes Cluster: Part 2 - VM installation
Welcome back to our series on building an highly separated Talos Kubernetes cluster! In this second instalment, i'll focus on preparing your Proxmox environment. This involves creating a Proxmox image template for the Ubuntu VMs, downloading necessary images for the management client, and setting up…
Continue reading...
Highly separated Talos Kubernetes Cluster: Part 1 - Overview
Welcome to the overview of a series on building an Talos Kubernetes cluster with enhanced security. This journey will take you through every step, from setting up the initial infrastructure to deploying a fully functional demo application. In this introductory post, we'll discuss why I'm…
Continue reading...