Highly separated Talos Kubernetes Cluster: Part 2 - VM installation

Welcome back to our series on building an highly separated Talos Kubernetes cluster! In this second instalment, i'll focus on preparing your Proxmox environment. This involves creating a Proxmox image template for the Ubuntu VMs, downloading necessary images for the management client, and setting up the network bridges for the different networks.
System requirements for Proxmox
I used an old Thinkcentre M910 from 2018 for this lab. So the requirements are really low level. A decent amount of ram (32GB) and a not too old cpu should be doing it. The Thinkcentre has only one network interface, so I'm working with vlan's in my setup. If you have two or more interface, you can split the incoming networks (client and server). It depends on your own configuration.
All configuration needed for this part (excluding the Ubuntu Desktop installation) can be found in my GIT repository.
Creating a Proxmox image template
One of the first steps is to create an image template that we can use to quickly spin up new virtual machines (VMs) based on cloud-image. This template will serve as our base image for the registry VM in our setup. I already documented the involved steps in my post "Deploy Proxmox virtual machines using Cloud-init"
Downloading necessary images
Next, you’ll need to download images for the following components:
Ubuntu Desktop: Ubuntu Desktop 24.03.3 LTS Amd64
PFSense Firewall: pfSense CE 2.7.2
You can download it directly through the Proxmox GUI:
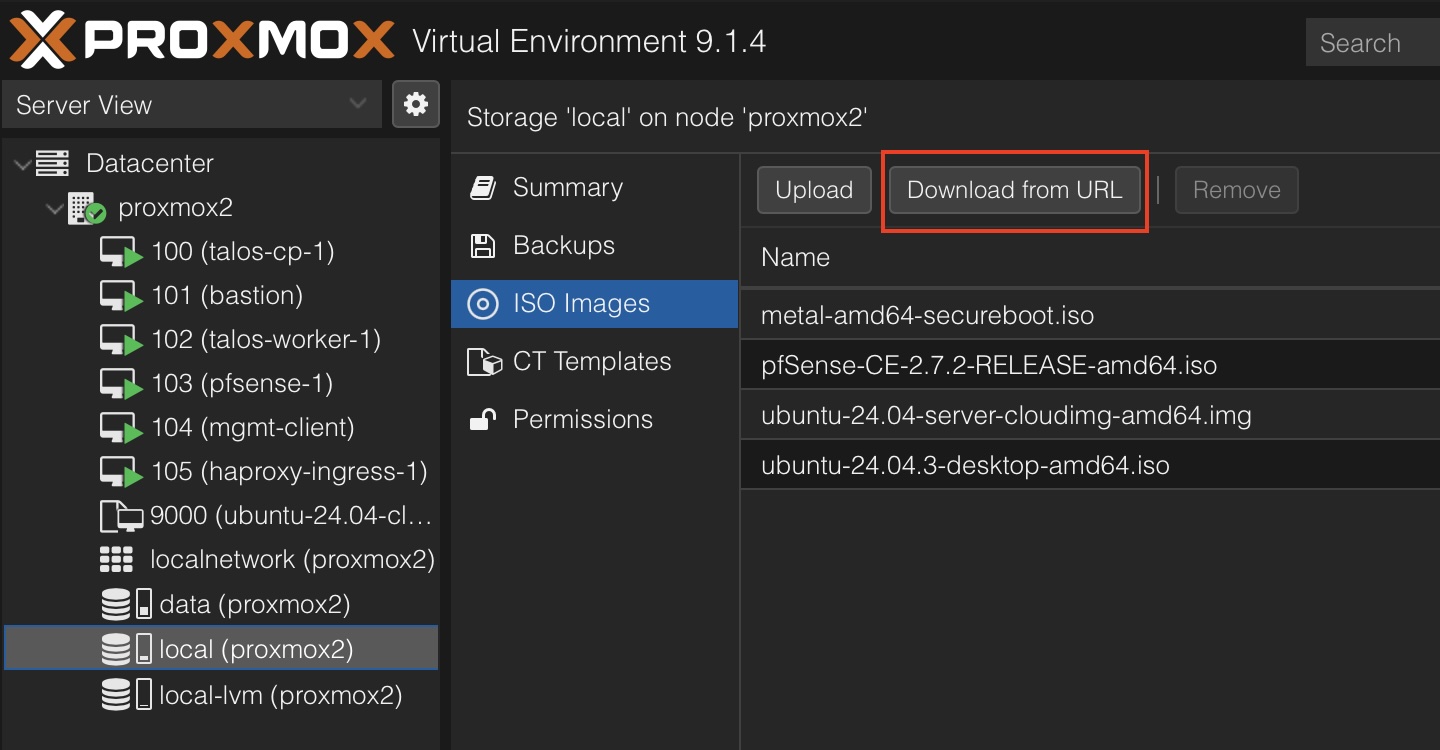
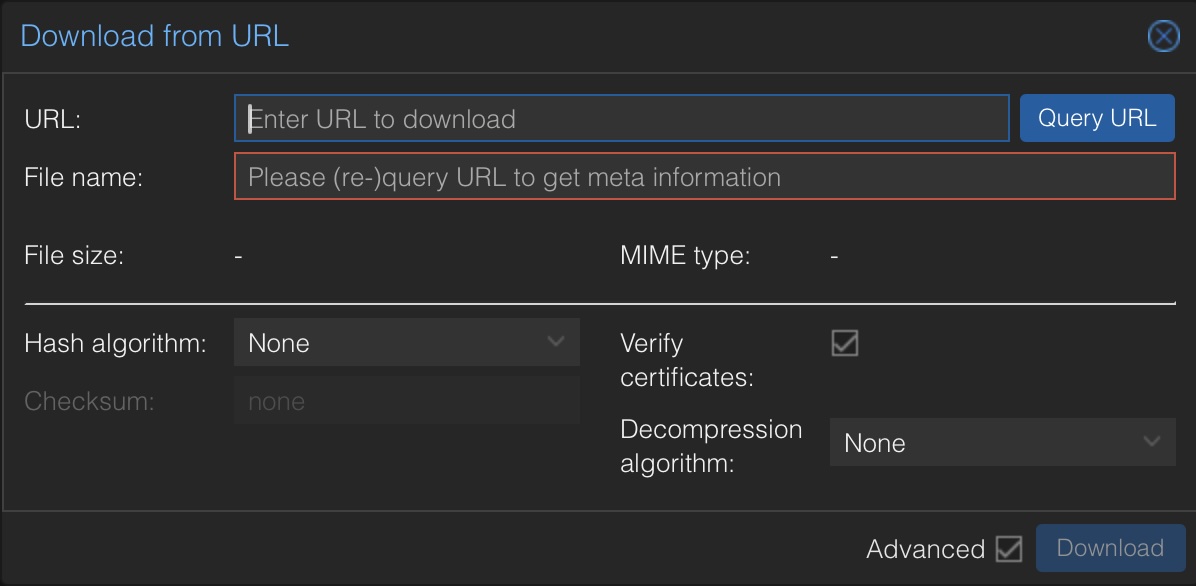
Copy the URL for the image into the "URL" field and click "Query URL" - after that you should see the file name which you put into the OpenTofu config in the next steps. Click on "Download" to download the file directly into Proxmox. Continue with all the components listed above.
Configure keyless login for cloud-init
You can always add a ssh key to your cloud-init configuration, but for now I'm activating password login for the ubuntu user in the ubuntu cloud images. For this you need to copy the following cloud-init configuration to /var/lib/vz/snippets (you have to create the snippets folder
#cloud-config
users:
  - name: ubuntu
    shell: /bin/bash
    sudo: ['ALL=(ALL) NOPASSWD:ALL']
ssh_pwauth: True ## This line enables ssh password authentication
Creating Proxmox network bridges
Proper network setup is crucial for implementing the lab. We’ll create multiple network bridges to isolate traffic between different components in conjunction wit pfSense. Remember from the first post we need three different networks:
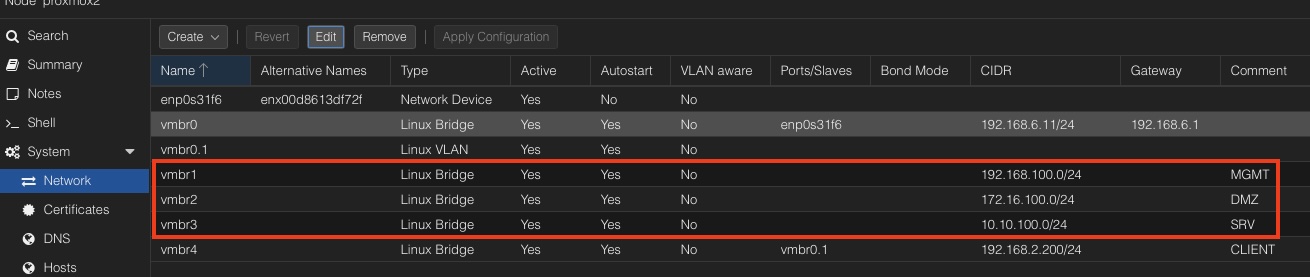
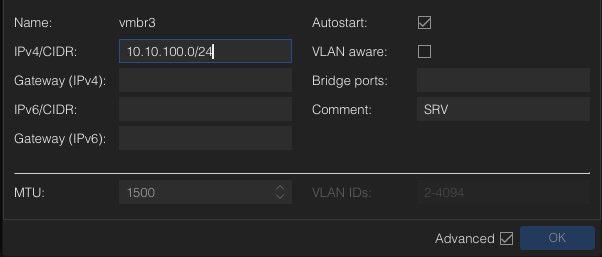
These networks are local only Linux bridges. Means that they don't have any other network ports bridged and cannot communicate outside your Proxmox node. Just add a bridge, fill in the device name vmbrX and the CIDR notation for the network. In my example I used the following network convention:
- DMZ - dmz.lab.internal 172.16.100.0/24
- MGMT mgmt.lab.internal 192.168.100.0/24
- SRV - srv.lab.internal 10.10.100.0/24
Additionally, we have the main network connection, needed for pfSense as WAN port. So all outgoing traffic will go through this one. Normally this is vmbr0 in a default installation of Proxmox. For convenience reasons I've created an additional vlan in my home network to create a CLIENT network inside Proxmox to reach the management client (which will be installed later) directly from my home setup. It is possible to achieve this through the default lan connection too, but I didn't like the idea to mix up the functionality and to get a clear cut between INGRESS and EGRESS traffic.
Provisioning through OpenTofu
As stated in the first post I'm going to use OpenTofu for installation of the VMs. Everyone who uses Terraform should have not problem with OpenTofu which is the Open-Source fork. I'm not going into installation of the cli. This can be found in the cli installation guide for your environment.
For the lab the following infrastructure is needed:
- 1 x Management Client
- 1 x pfSense Firewall
- 1 x HAProxy Ingress
- 1 x Registry
- 1 x Talos control plane node
- 1 x Talos worker node
If you are new to Terraform provisioning with Proxmox I can recommend a blog post I've written years ago: Install Proxmox virtual machines with Terraform The post will guide you through the configuration of the needed provider and describe the lifecycle of a typical provisioning process.
To speed up the deployment process I've already created a ready to use configuration on in my GIT repository. You just have to change the user/pwd of the api user as well as the Proxmox hostname in the provider config. If you have different image names created during the image download process or use different template names for your Proxmox templates you have to change that, as well as for changed vmbrX network names.
Be aware that the Talos control plane and the Talos worker node ist disabled for now. We're going to enable that and rerun OpenTofu after the Talos image factory has been installed and configured. This is necessary, because we're using SecureBoot and if the images change during installation, you have to reset the bios state.
Back to business. To start with OpenTofu three different yaml files have to be created:
- provider.tf --> holds the configuration for the Proxmox provider
- variables.tf --> replaces the placeholder in all other configuration files
- main.tf --> includes all the information about the VMs we're going to provision
# provider.tf

terraform {
  required_providers {
    proxmox = {
      source  = "telmate/proxmox"
      version = "3.0.2-rc07"
    }
  }
}

provider "proxmox" {
  pm_parallel     = 1
  pm_tls_insecure = true
  pm_api_url      = var.pm_api_url
  pm_password     = var.pm_password
  pm_user         = var.pm_user
  pm_log_enable   = true
  pm_log_file     = "terraform-plugin-proxmox.log"
  pm_debug        = true
  pm_log_levels = {
    _default    = "debug"
    _capturelog = ""
  }
}
# variables.tf

variable "pm_api_url" {
  default = "https://fill in your hostname:8006/api2/json"
}

variable "pm_user" {
  default = "fill in your user"
}

variable "pm_password" {
  default = "fill in your password"
}
# main.tf

# Control Plane
# resource "proxmox_vm_qemu" "controlplane" {
#   name        = "talos-cp-${count.index + 1}"
#   target_node = "proxmox2"
#   count       = 1
#   bios        = "ovmf"
#   agent       = 1
#   machine     = "q35"
#   skip_ipv6   = true

#   startup_shutdown {
#     order             = 3
#     shutdown_timeout  = -1
#     startup_delay     = -1
#   }

#   start_at_node_boot = true
#   cpu {
#     cores = 4
#     sockets = 1
#     type = "host"
#   }
#   memory   = 6144
#   scsihw   = "virtio-scsi-pci"
#   boot     = "order=scsi0;ide2"

#   disks {
#     ide {
#       ide2 {
#         cdrom {
#           iso = "local:iso/metal-amd64-secureboot.iso"
#         }
#       }
#     }
#     scsi {
#       scsi0 {
#         disk {
#           size     = "64G"
#           storage  = "data"
#         }
#       }
#     }
#   }

#   efidisk {
#     efitype = "4m"
#     storage = "data"
#   }

#   network {
#     model  = "virtio"
#     bridge = "vmbr3"
#     firewall = false
#     link_down = false
#     id = 1
#   }

#   rng {
#     period = 0
#     source = "/dev/urandom"
#   }

#   vga {
#     type   = "std"
#   }
# }

# Worker
# resource "proxmox_vm_qemu" "worker" {
#   name        = "talos-worker-${count.index +1}"
#   target_node = "proxmox2"
#   count       = 1
#   bios        = "ovmf"
#   agent       = 1
#   machine     = "q35"
#   skip_ipv6   = true

#   startup_shutdown {
#     order             = 4
#     shutdown_timeout  = -1
#     startup_delay     = -1
#   }

#   start_at_node_boot = true
#   cpu {
#     cores = 4
#     sockets = 1
#     type = "host"
#   }
#   memory   = 8172
#   scsihw   = "virtio-scsi-pci"
#   boot     = "order=scsi0;ide2"

#   disks {
#     ide {
#       ide2 {
#         cdrom {
#           iso = "local:iso/metal-amd64-secureboot.iso"
#         }
#       }
#     }
#     scsi {
#       scsi0 {
#         disk {
#           size     = "100G"
#           storage  = "data"
#         }
#       }
#     }
#   }

#   efidisk {
#     efitype = "4m"
#     storage = "data"
#   }

#   network {
#     model  = "virtio"
#     bridge = "vmbr3"
#     firewall = false
#     link_down = false
#     id = 1
#   }

#   rng {
#     period = 0
#     source = "/dev/urandom"
#   }

#   vga {
#     type   = "std"
#   }
# }

# PFSense Firewall
resource "proxmox_vm_qemu" "firewall" {
  name        = "pfsense-${count.index +1}"
  target_node = "proxmox2"
  count       = 1
  bios        = "ovmf"
  machine     = "q35"
  skip_ipv6   = true

  startup_shutdown {
    order             = 1
    shutdown_timeout  = -1
    startup_delay     = -1
  }

  start_at_node_boot = true
  cpu {
    cores = 1
    sockets = 1
    type = "host"
  }
  memory   = 1024
  boot     = "order=virtio0;ide2"

  disks {
    ide {
      ide2 {
        cdrom {
          iso = "local:iso/pfSense-CE-2.7.2-RELEASE-amd64.iso"
        }
      }
    }
    virtio {
      virtio0 {
        disk {
          size     = "10G"
          storage  = "data"
          iothread = true
        }
      }
    }
  }

  efidisk {
    efitype = "4m"
    storage = "data"
  }

  # WAN
  network {
    model  = "virtio"
    bridge = "vmbr0"
    firewall = false
    link_down = false
    id = 0
  }

  # MGMT
  network {
    model  = "virtio"
    bridge = "vmbr1"
    firewall = false
    link_down = false
    id = 1
  }

  # DMZ
  network {
    model  = "virtio"
    bridge = "vmbr2"
    firewall = false
    link_down = false
    id = 2
  }

  # SRV
  network {
    model  = "virtio"
    bridge = "vmbr3"
    firewall = false
    link_down = false
    id = 3
  }

  rng {
    period = 0
    source = "/dev/urandom"
  }

  vga {
    type   = "std"
  }
}

# Bastion Host
resource "proxmox_vm_qemu" "bastion" {
  name        = "bastion"
  target_node = "proxmox2"
  count       = 1

  clone = "ubuntu-24.04-cloud-init-template"

  startup_shutdown {
    order             = 2
    shutdown_timeout  = -1
    startup_delay     = -1
  }

  os_type  = "cloud-init"
  start_at_node_boot = true
  cpu {
    cores = 2
    sockets = 1
    type = "host"
  }
  memory   = 4096
  scsihw   = "virtio-scsi-single"
  boot     = "order=scsi0"

  disks {
    ide {
      ide0 {
        cloudinit {
          storage = "data"
        }
      }
    }
    scsi {
      scsi0 {
        disk {
          size     = "50G"
          storage  = "data"
          iothread = true
        }
      }
    }
  }

  network {
    model  = "virtio"
    bridge = "vmbr1"
    id = 0
  }

  lifecycle {
    ignore_changes = [
      network,
    ]
  }

  # Cloud Init Settings
  ipconfig0 = "ip=192.168.100.11/24,gw=192.168.100.1"
  nameserver = "192.168.100.1"
  searchdomain = "mgmt.lab.internal"
  cipassword  = "ubuntu"
  cicustom    = "vendor=local:snippets/ci-custom.yml"
  ciupgrade   = true
}

# HAProxy Ingress Host
resource "proxmox_vm_qemu" "haproxy-ingess" {
  name        = "haproxy-ingress-1"
  target_node = "proxmox2"
  count       = 1

  clone = "ubuntu-24.04-cloud-init-template"

  startup_shutdown {
    order             = 5
    shutdown_timeout  = -1
    startup_delay     = -1
  }

  os_type  = "cloud-init"
  start_at_node_boot = true
  cpu {
    cores = 2
    sockets = 1
    type = "host"
  }
  memory   = 4096
  scsihw   = "virtio-scsi-single"
  boot     = "order=scsi0"

  disks {
    ide {
      ide0 {
        cloudinit {
          storage = "data"
        }
      }
    }
    scsi {
      scsi0 {
        disk {
          size     = "50G"
          storage  = "data"
          iothread = true
        }
      }
    }
  }

  network {
    model  = "virtio"
    bridge = "vmbr2"
    id = 0
  }

  lifecycle {
    ignore_changes = [
      network,
    ]
  }

  # Cloud Init Settings
  ipconfig0 = "ip=172.16.100.10/24,gw=172.16.100.1"
  nameserver = "172.16.100.1"
  searchdomain = "srv.lab.internal"
  cipassword  = "ubuntu"
  cicustom    = "vendor=local:snippets/ci-custom.yml"
  ciupgrade   = true
}


# Management Client
resource "proxmox_vm_qemu" "mgmt-client" {
  name        = "mgmt-client"
  target_node = "proxmox2"
  count       = 1
  bios        = "ovmf"
  agent       = 1
  machine     = "q35"
  skip_ipv6   = true

  startup_shutdown {
    order             = 6
    shutdown_timeout  = -1
    startup_delay     = -1
  }

  start_at_node_boot = true
  cpu {
    cores = 2
    sockets = 1
    type = "host"
  }
  memory   = 4096
  scsihw   = "virtio-scsi-pci"
  boot     = "order=scsi0;ide2"

  disks {
    ide {
      ide2 {
        cdrom {
          iso = "local:iso/ubuntu-24.04.3-desktop-amd64.iso"
        }
      }
    }
    scsi {
      scsi0 {
        disk {
          size     = "64G"
          storage  = "data"
        }
      }
    }
  }

  efidisk {
    efitype = "4m"
    storage = "data"
  }

  network {
    model  = "virtio"
    bridge = "vmbr1"
    firewall = false
    link_down = false
    id = 1
  }

  network {
    model  = "virtio"
    bridge = "vmbr4"
    firewall = false
    link_down = false
    id = 2
  }

  rng {
    period = 0
    source = "/dev/urandom"
  }

  vga {
    type   = "virtio"
    memory = 128
  }
}
After the files have ben set up, the provider needs to be installed first:
tofu init
If everything wents fine you should see the following information:
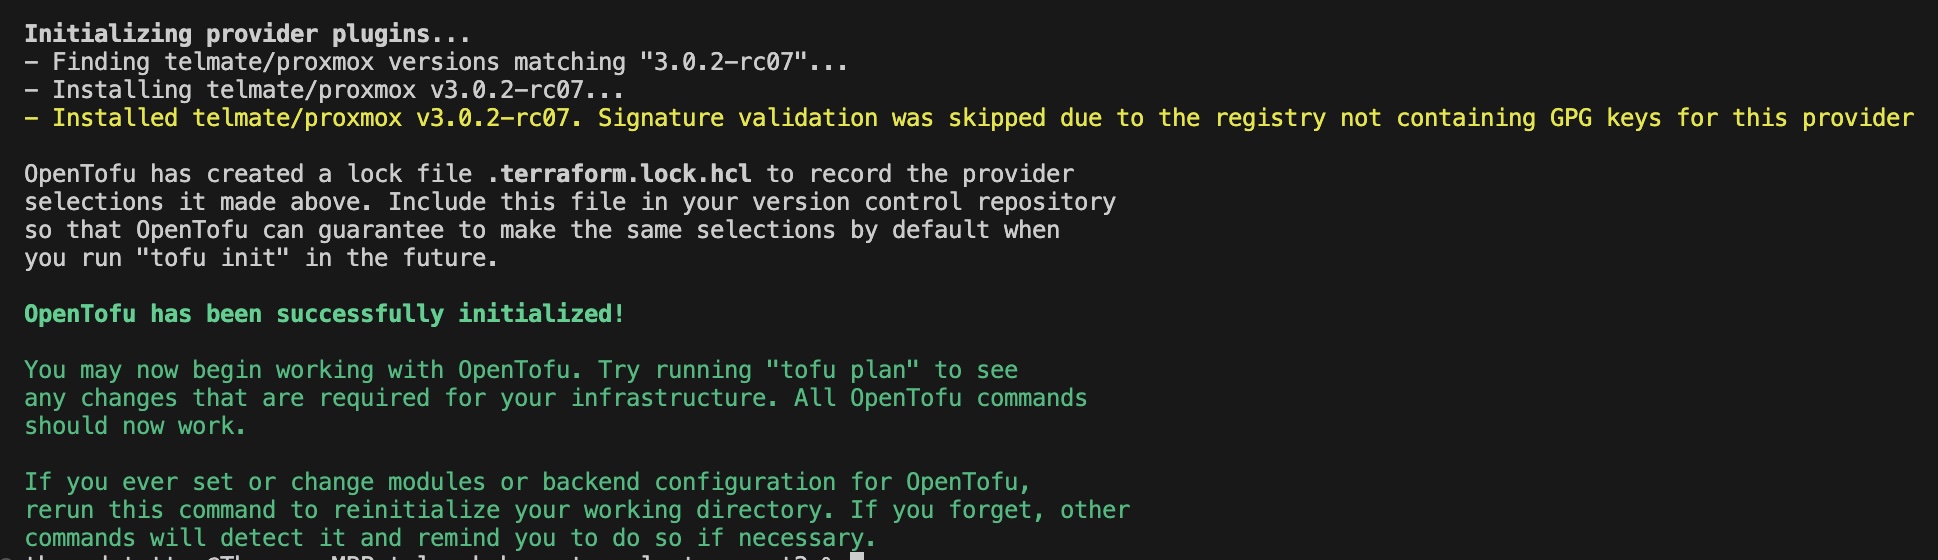
Now we can plan our provisioning:
tofu plan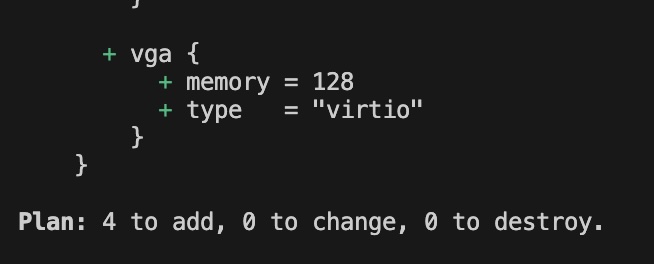
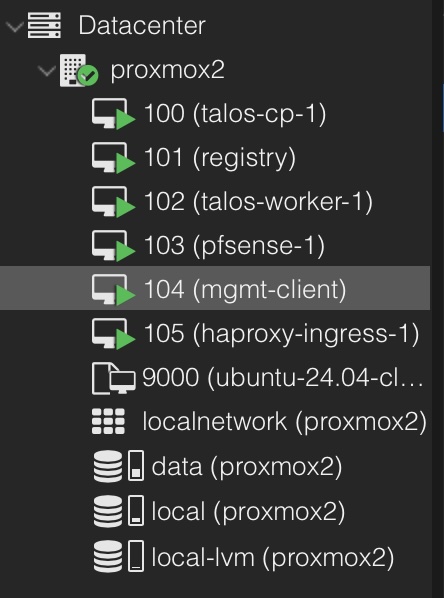
There should be only add's for the first run. Last but not least tofu apply will start the provisioning:
tofu applyIn the end you should see the new installed VMs in your Proxmox instance (Talos nodes excluded right now!)
Install Ubuntu management client
For managing pfSense and as a passthrough for or other VMs I'm using Ubuntu Desktop. I'm not going into detail how to install an Linux desktop system, because on this level we're operating it should be a no brainer. If you need a guidance, there is a great tutorial on thedev.uk
The key points for the installation are:
- Use just the Basic Software
- Install 3rd Party Software
- (Optional) Disable Password for Login
- apt install qemu-guest agent ssh
Additionally, we disabling the automatic gateway setting in the second network interface which sould be the lan/vlan to your homelab client network:
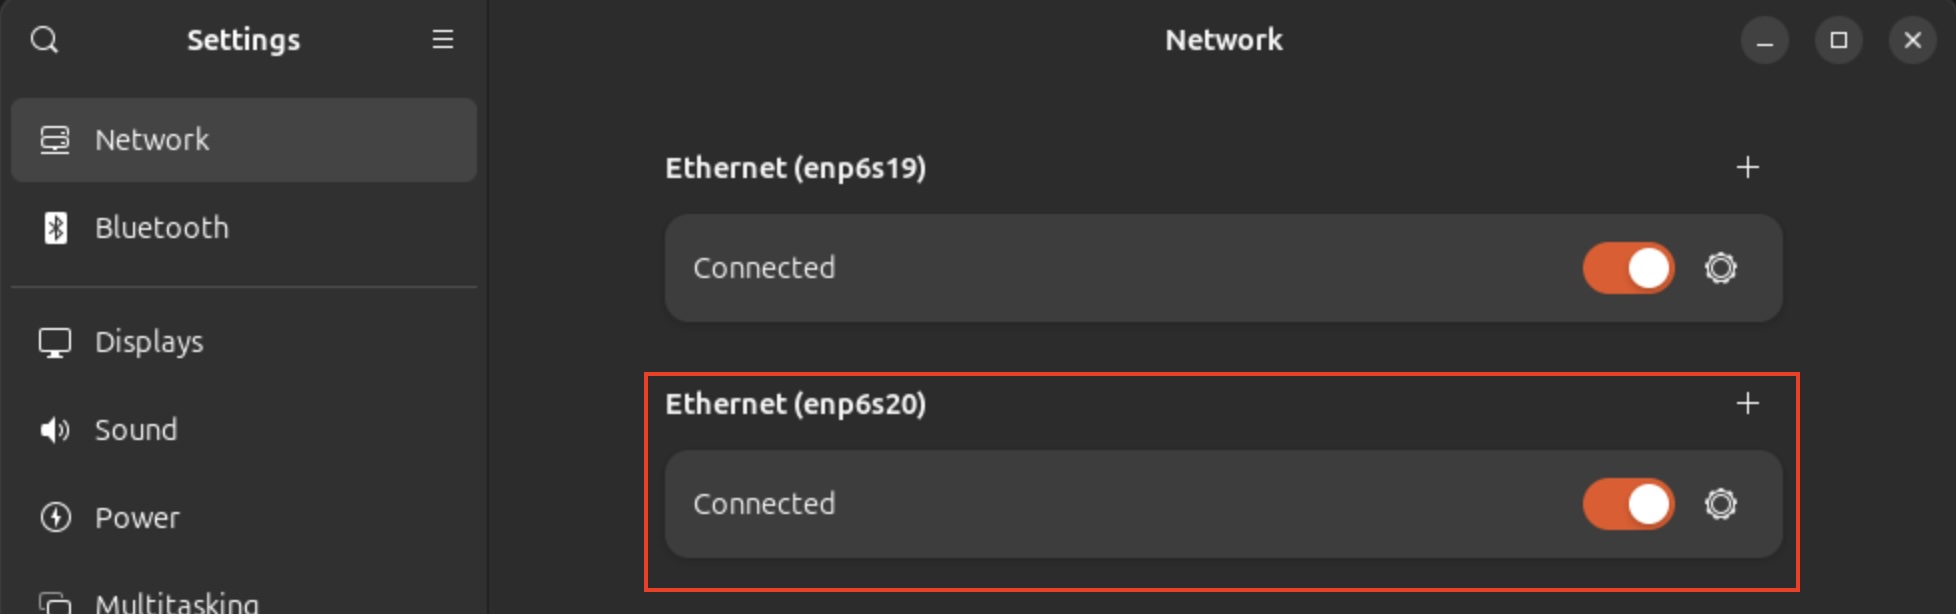
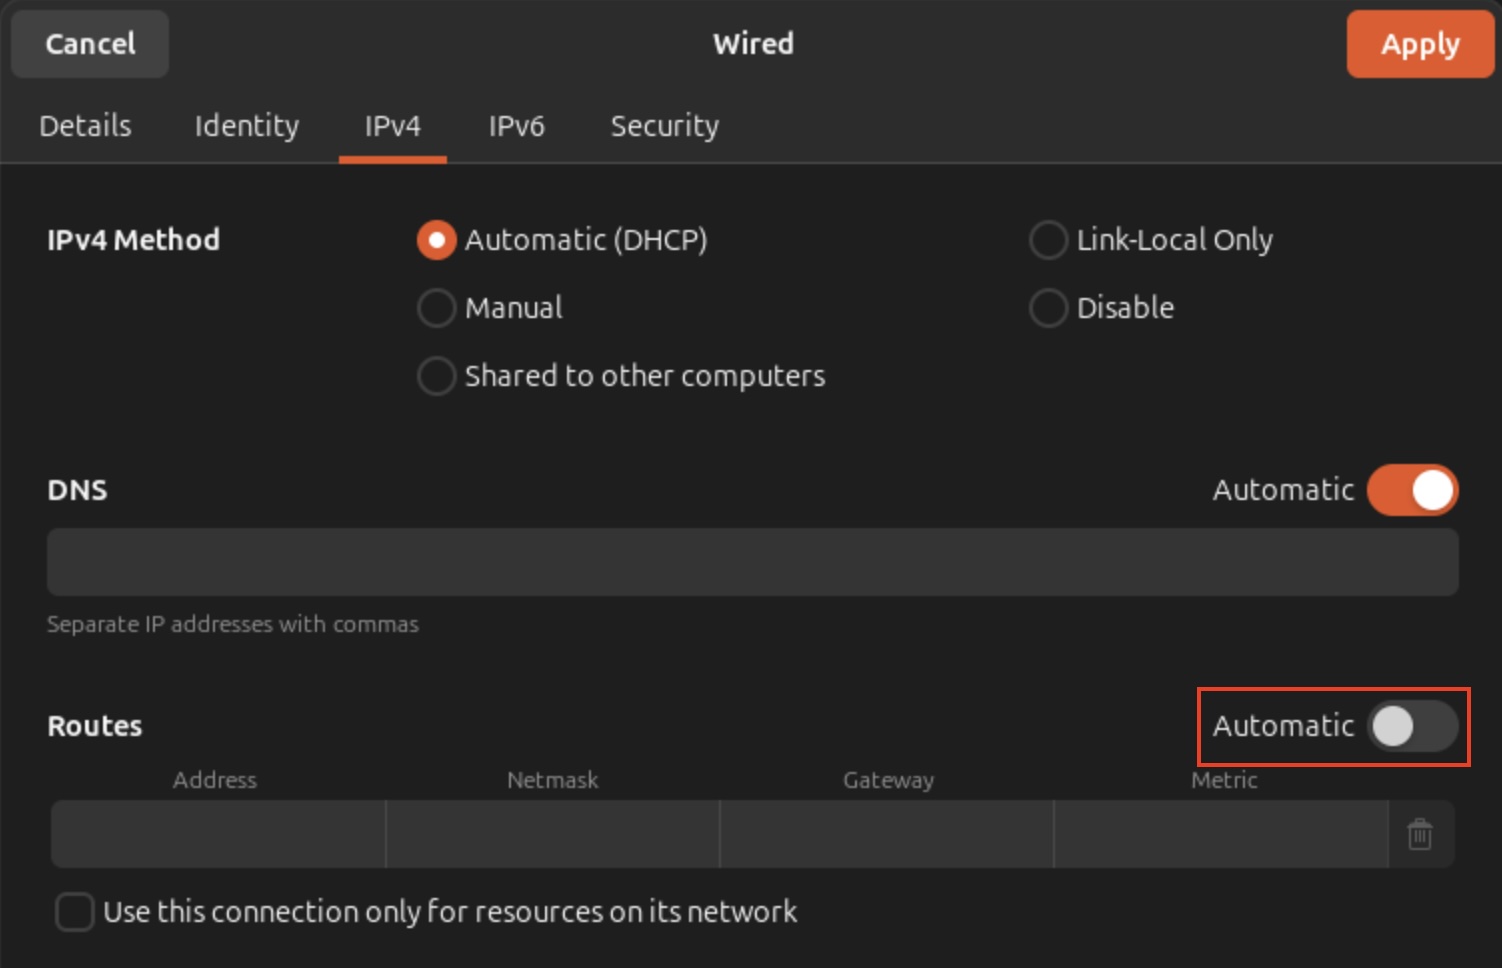
This is needed to avoid asynchronous routing between your network outside of Proxmox and pfSense.
Configure pfSense
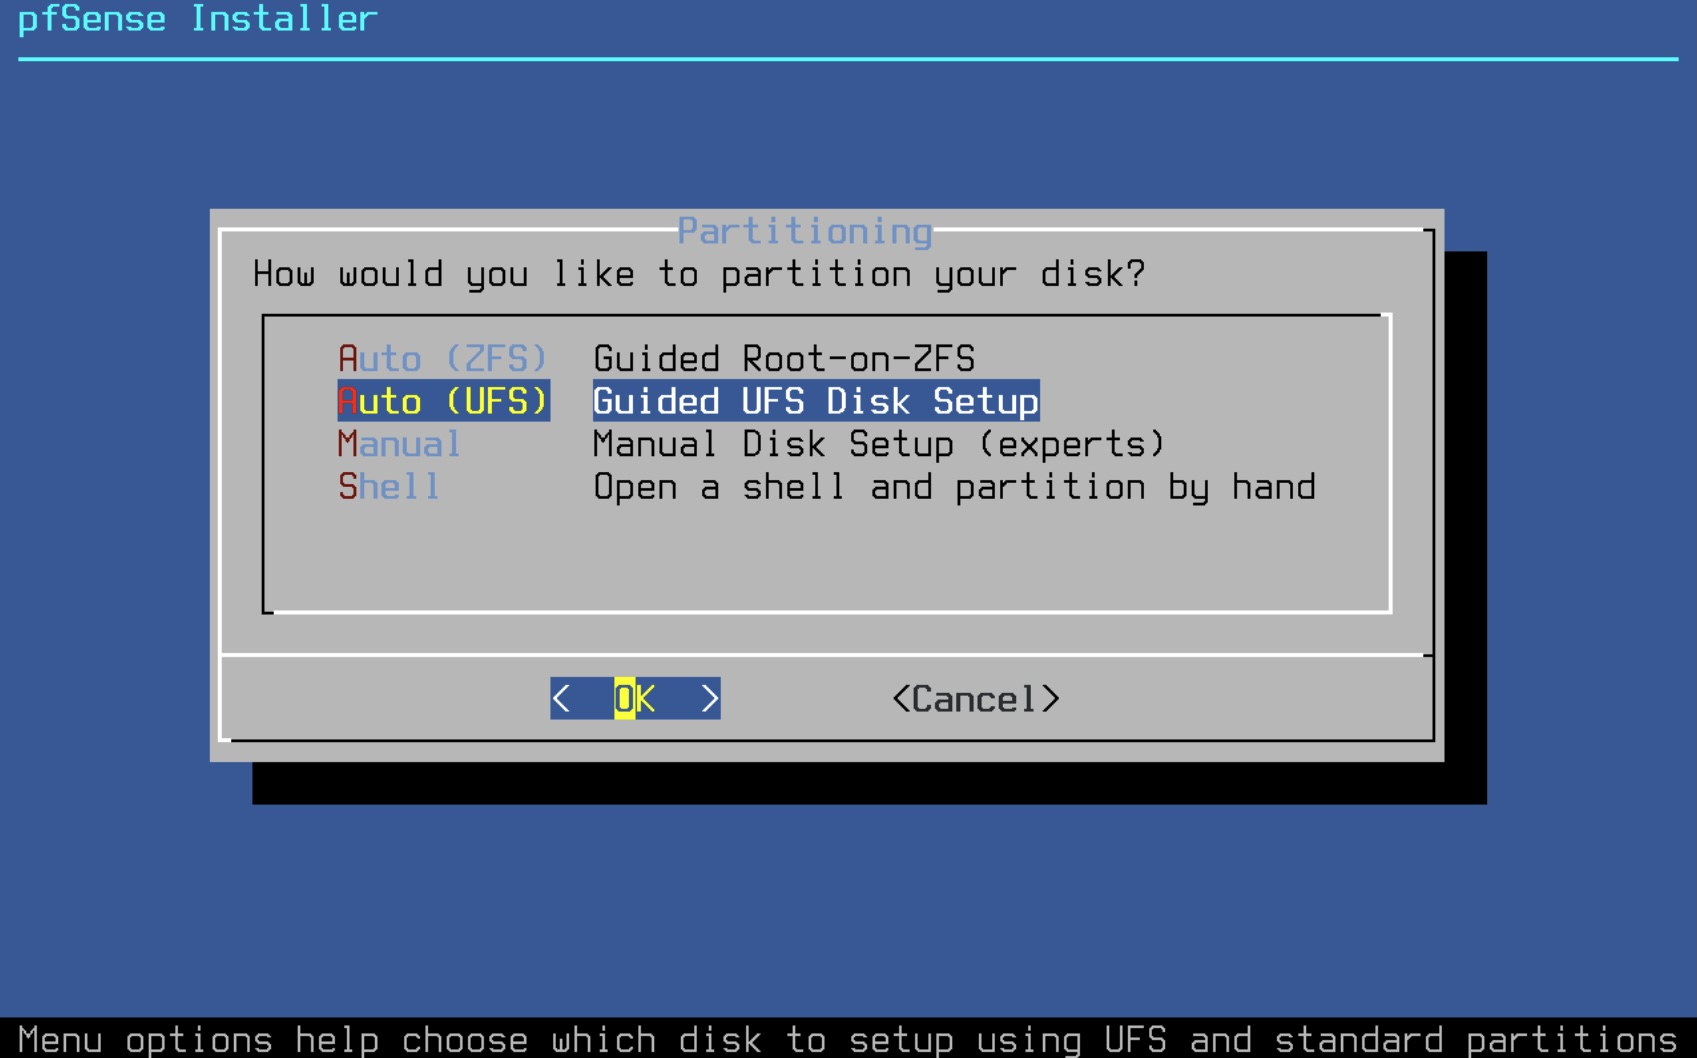
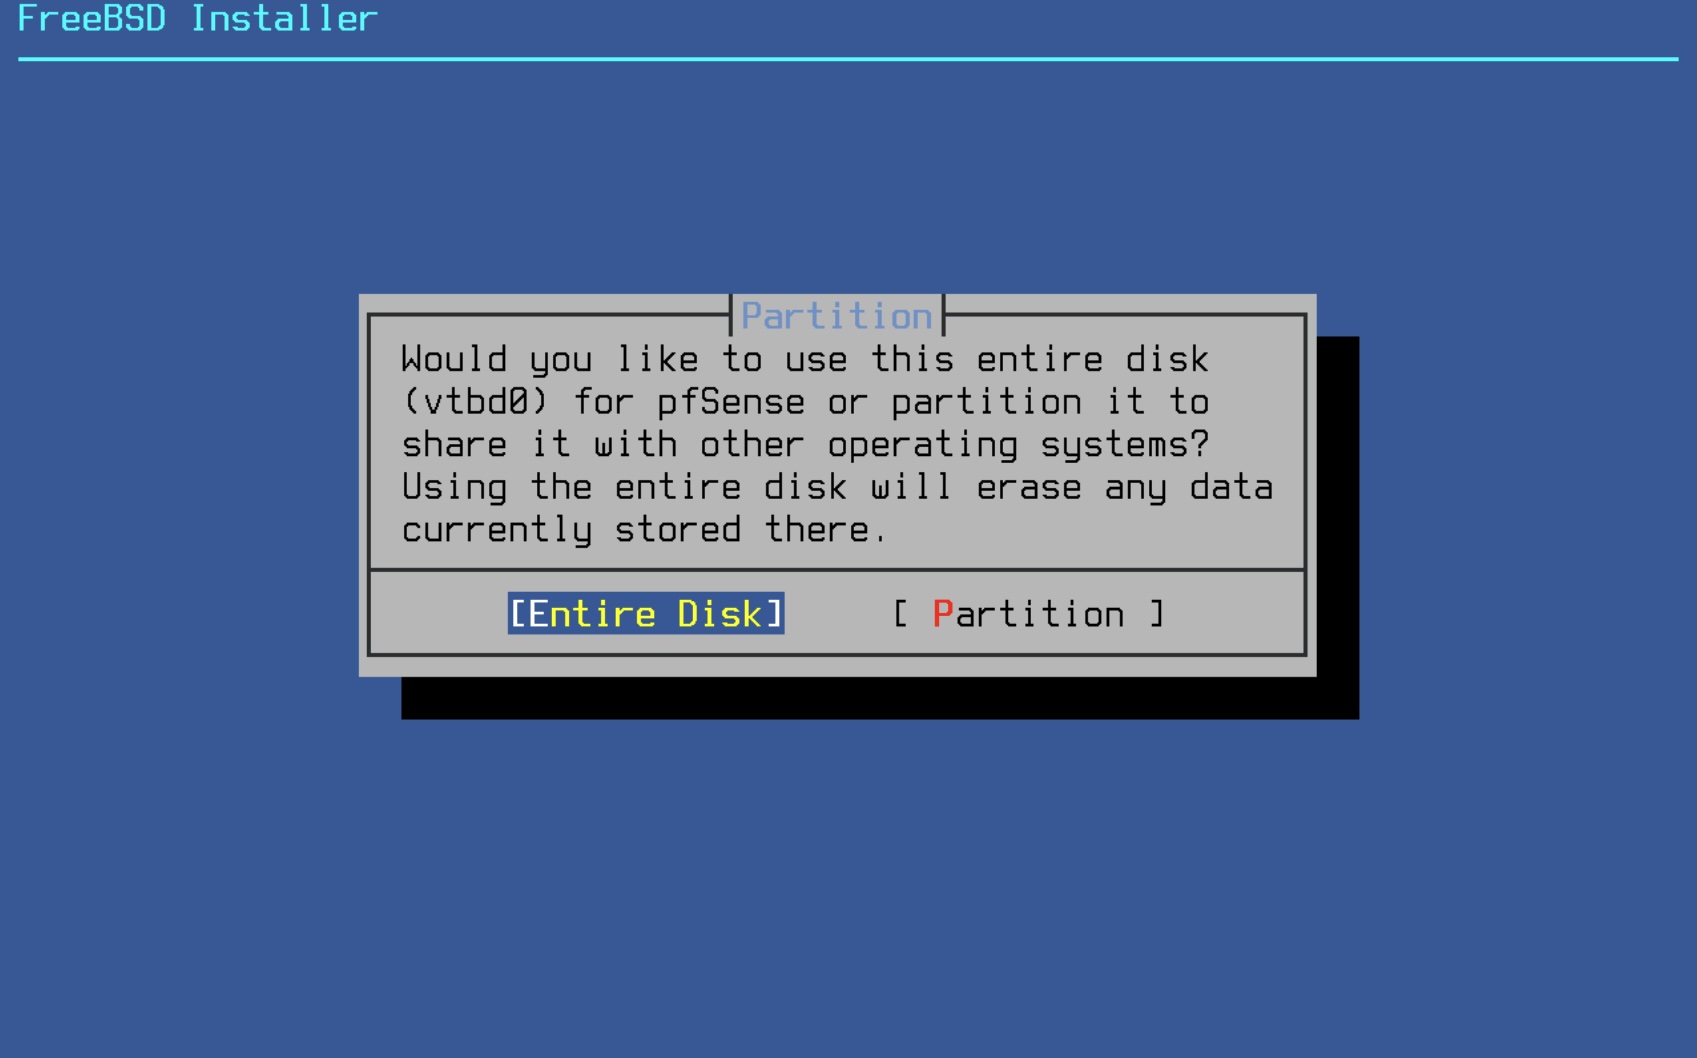
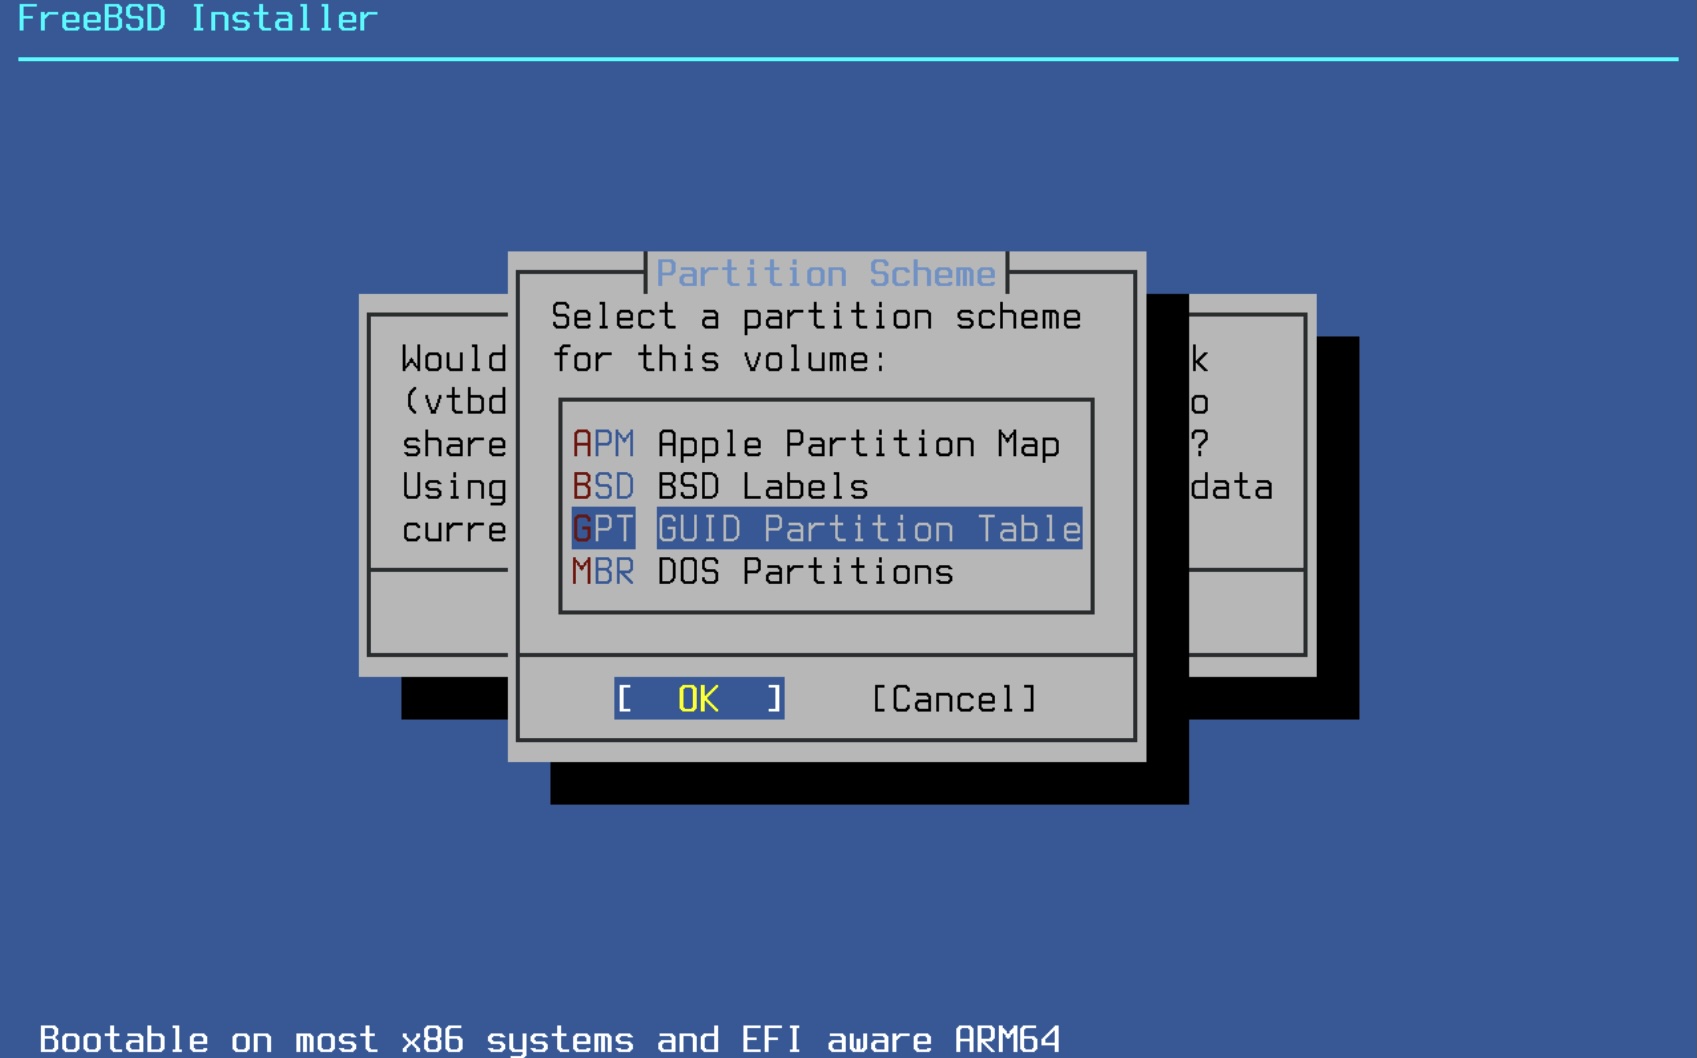
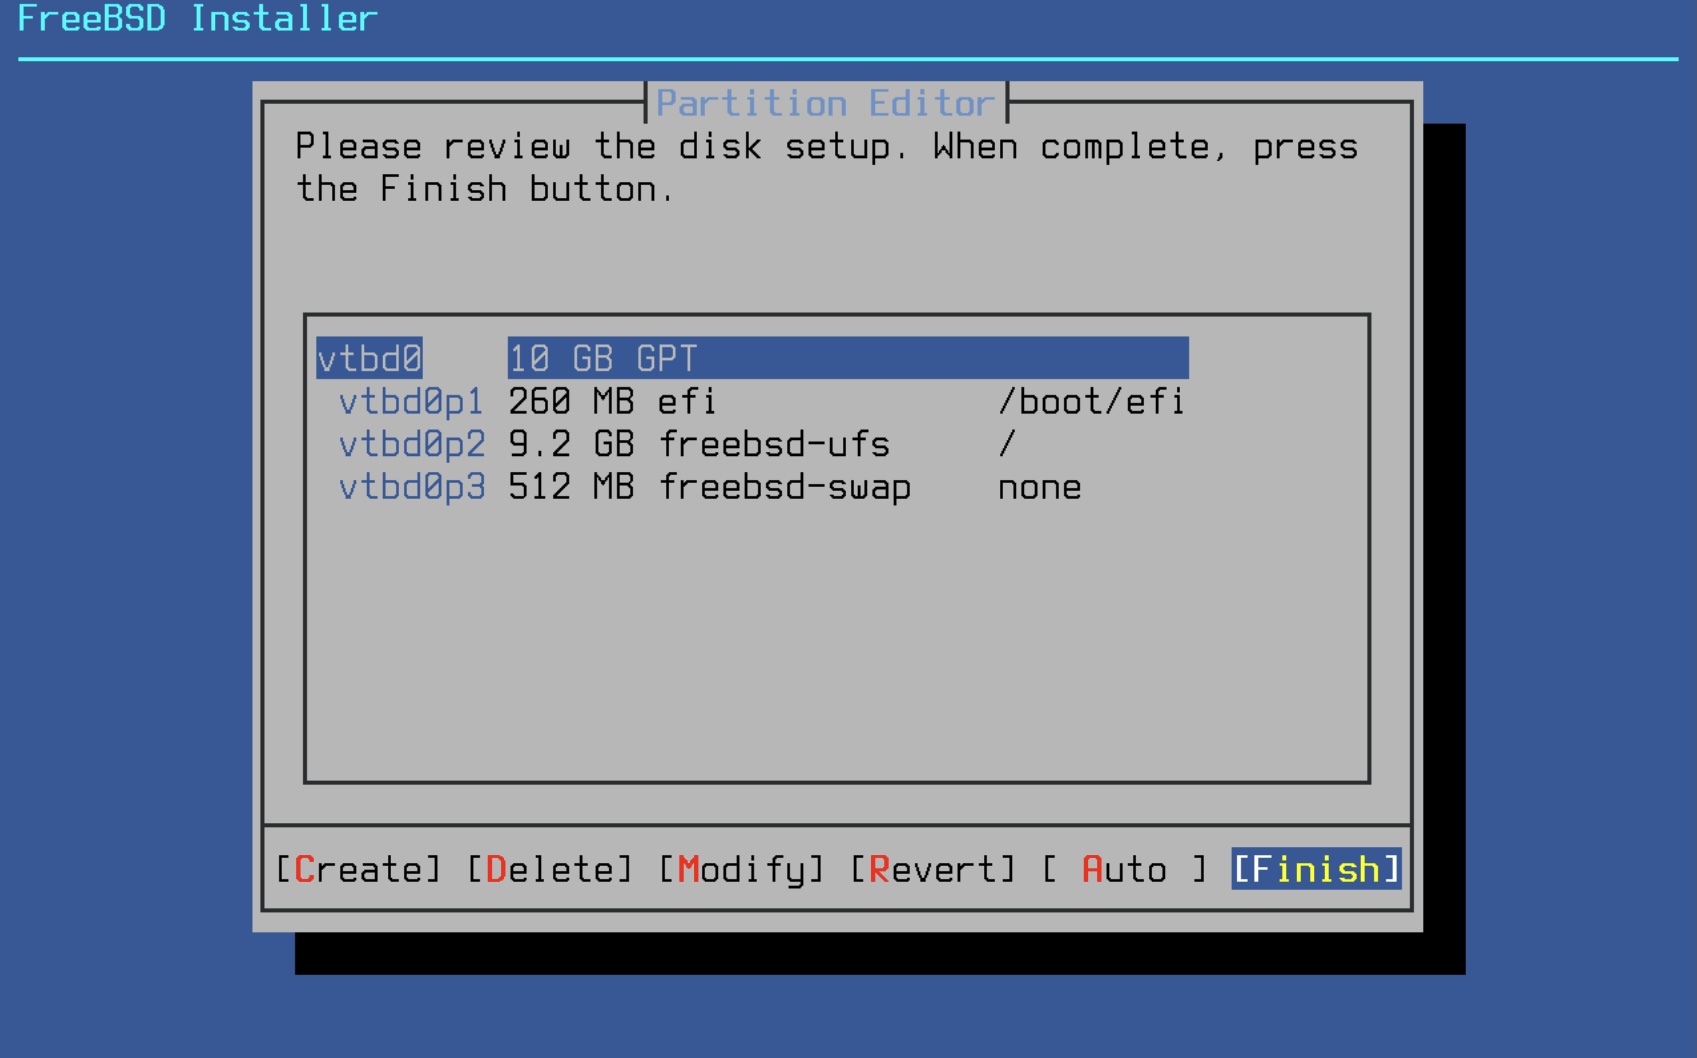
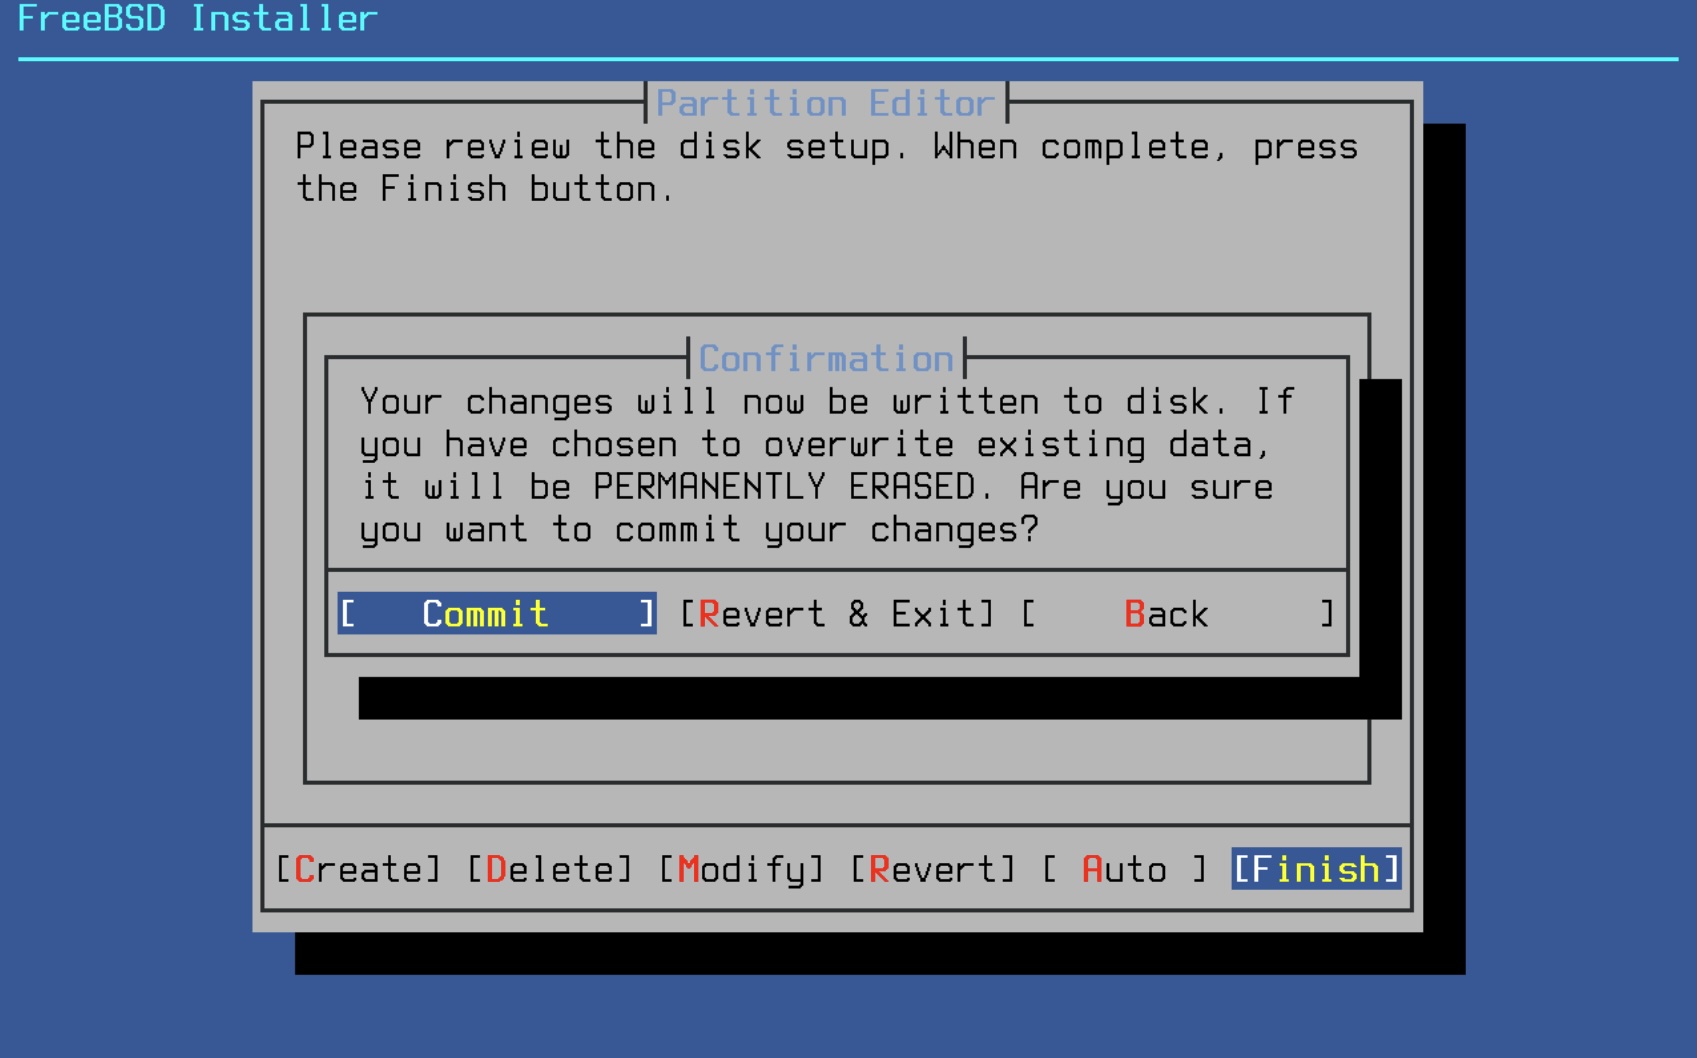
Go to the Proxmox console of your pfSense host and start the installation. You can use the standard values in the installation setup. For the disk filesystem I personally prefer UFS for this lab.
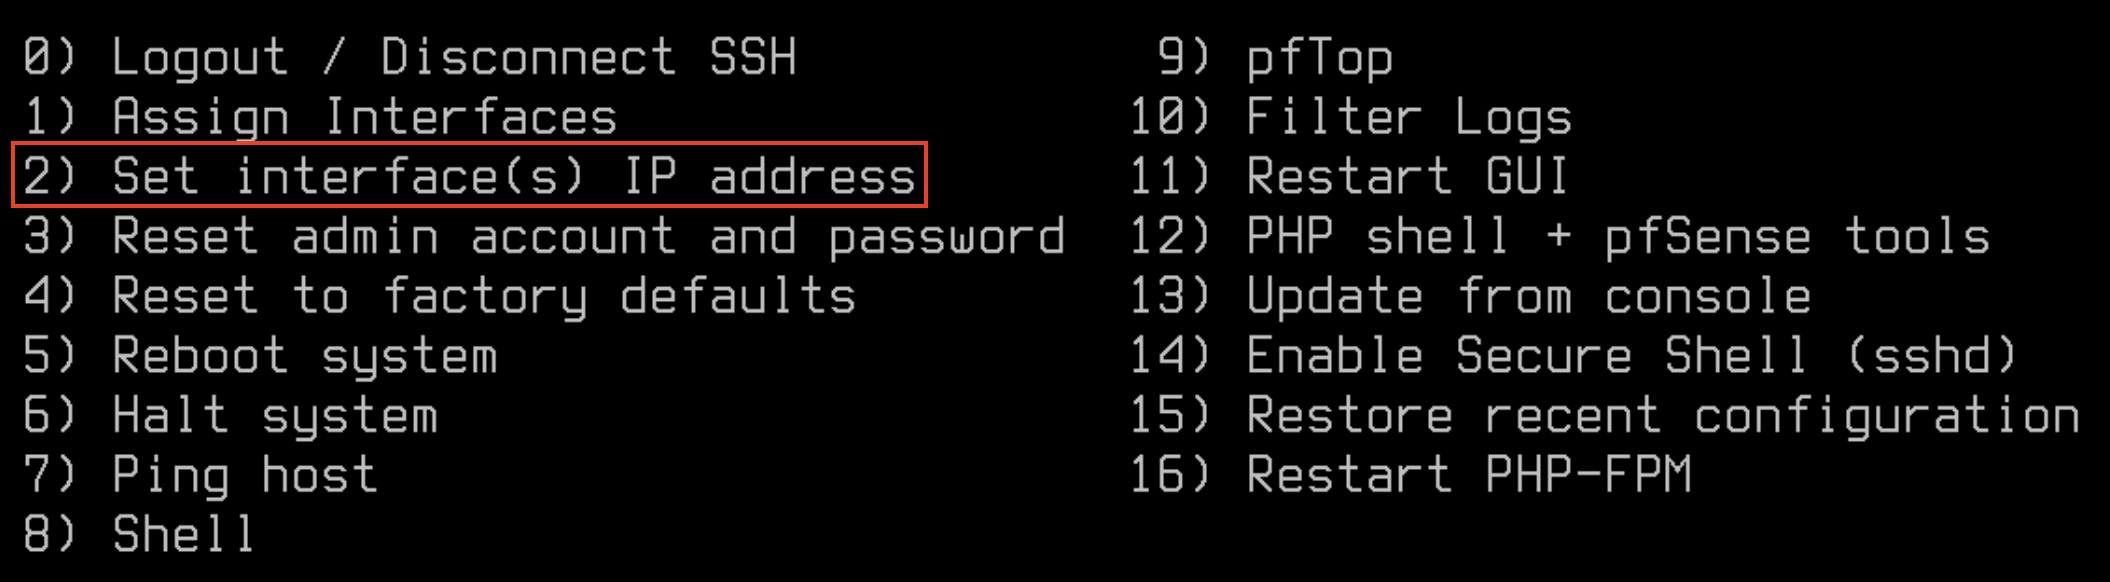
After a reboot we could enter the initial WAN and MGMT interface configuration so that we can do the rest of the setup over the web browser:
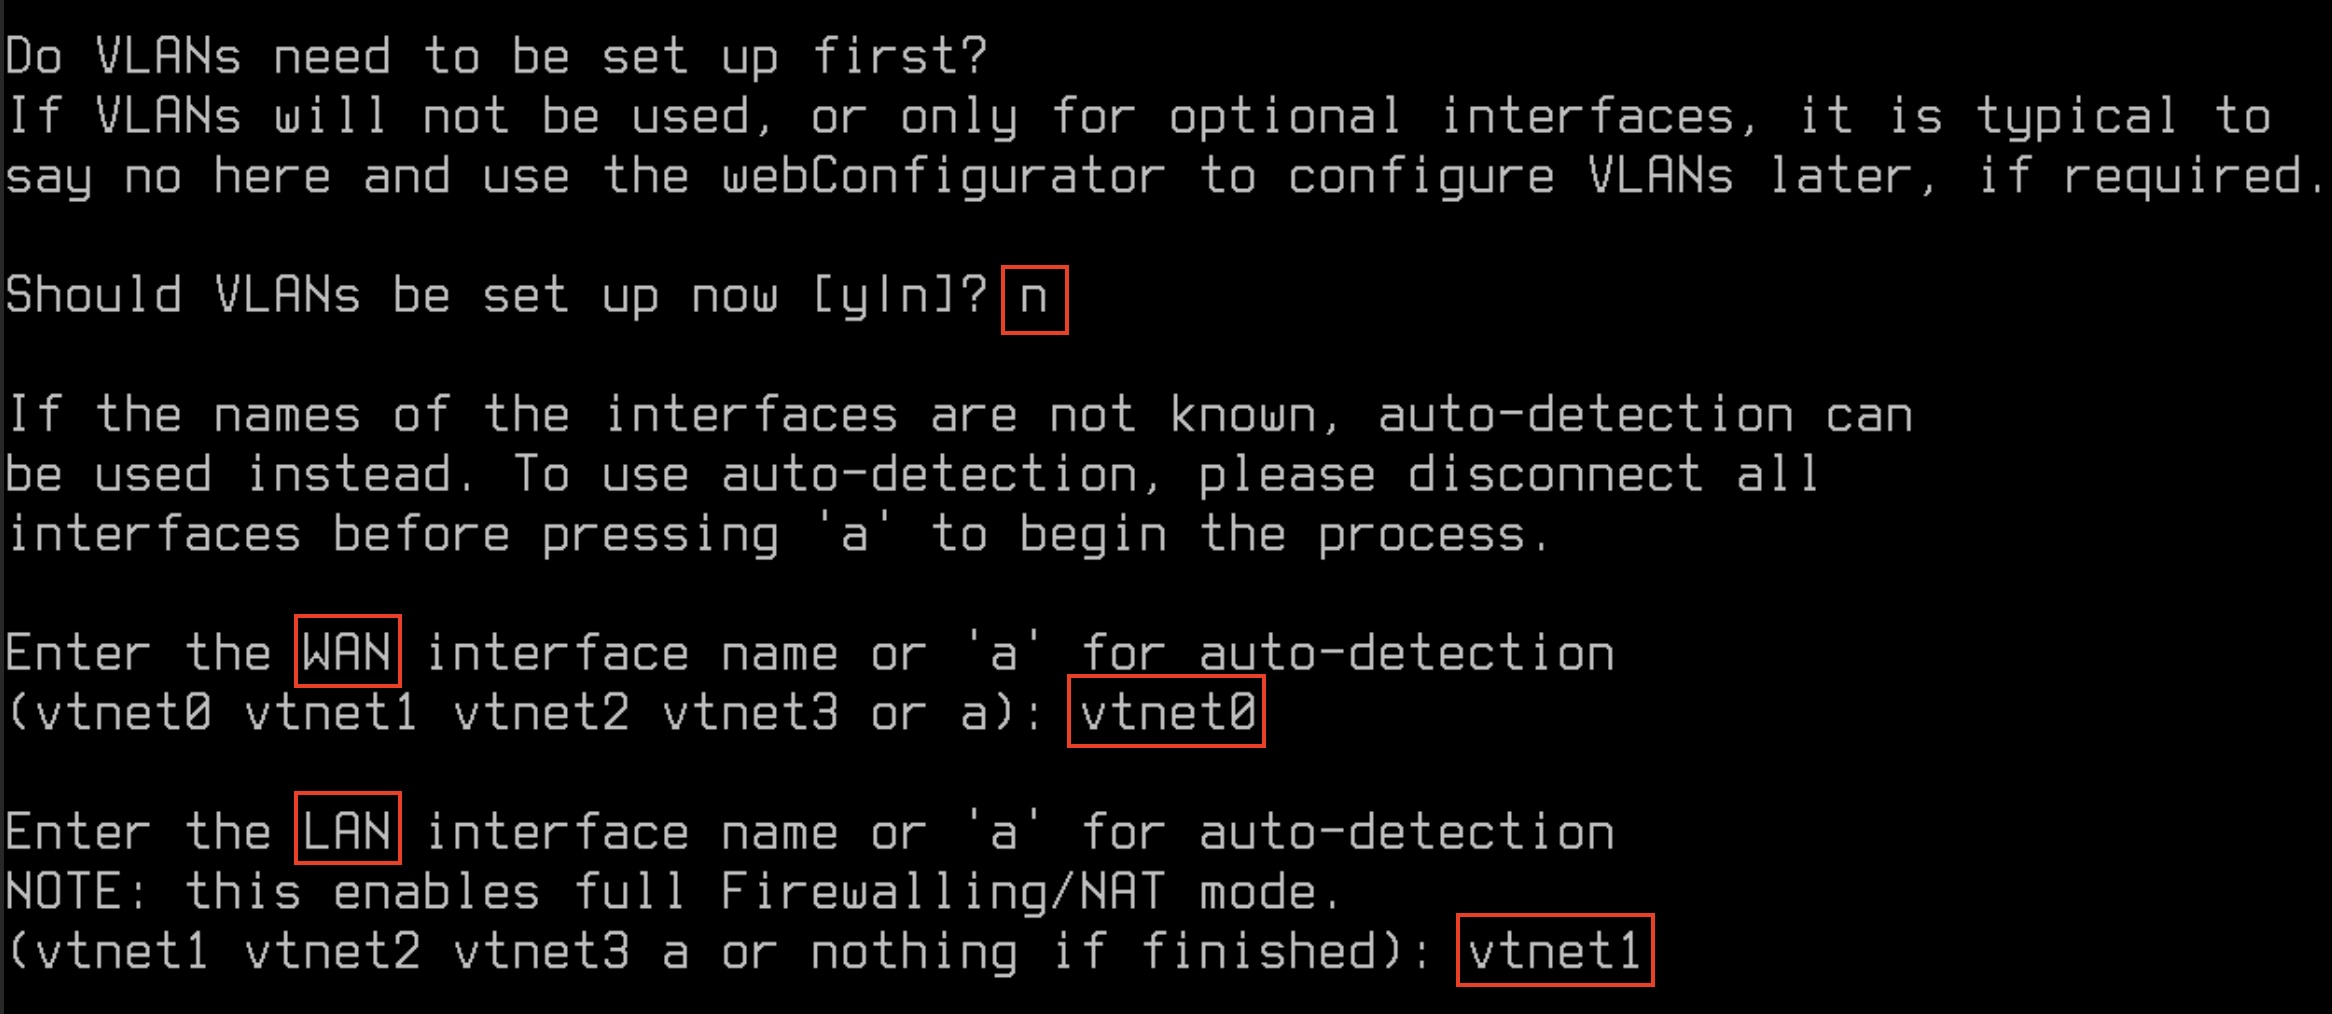
Continue this for vtnet2 and vtnet3. The network interfaces in the console should look like this right now
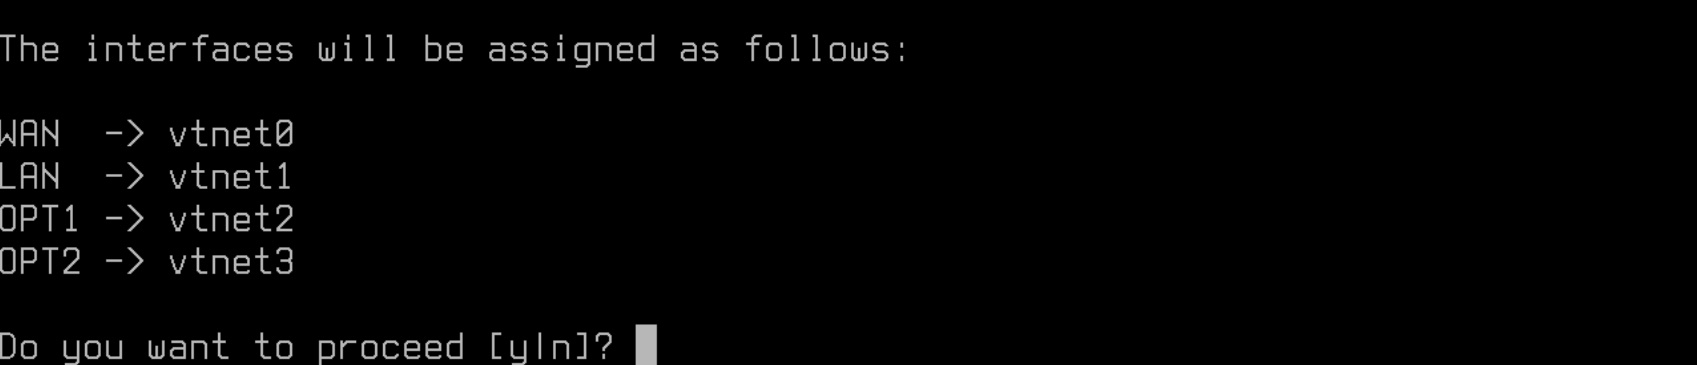
- WAN -> vtnet0 -> v4/DHCP4 -> Server lan ip
- LAN -> vtnet1 -> v4
- OPT1 -> vtnet2 -> v4
- OPT2 -> vtnet3 -> v4
To get access to the management gui from the management client, we need to statically set an ip address. For this lab we'll take the ip 192.168.100.1:
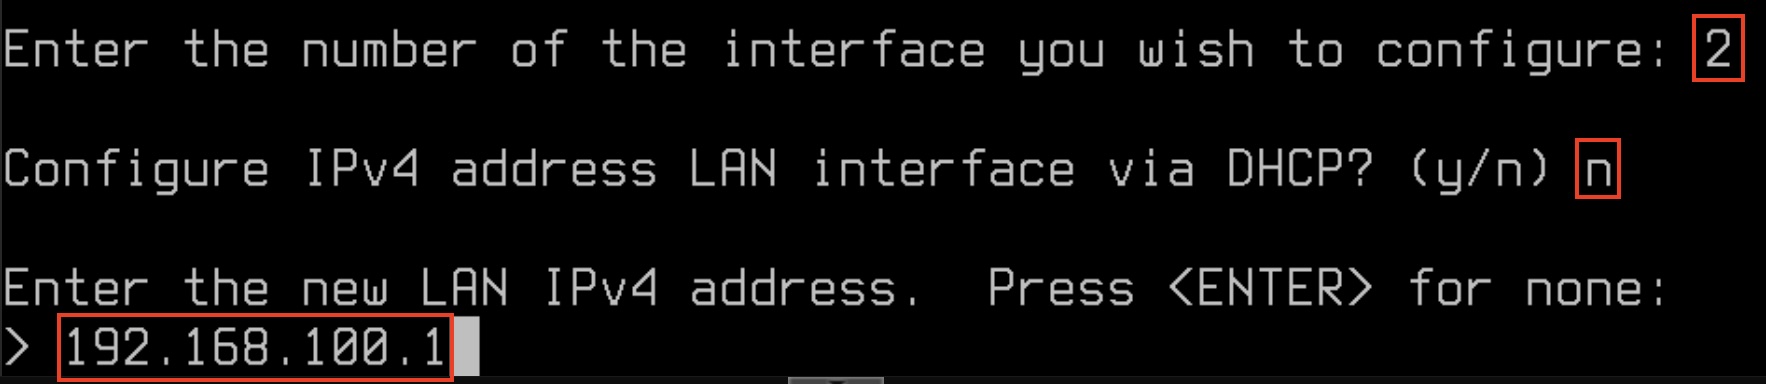

Now you should be able to see the admin interface through the web browser on the management client
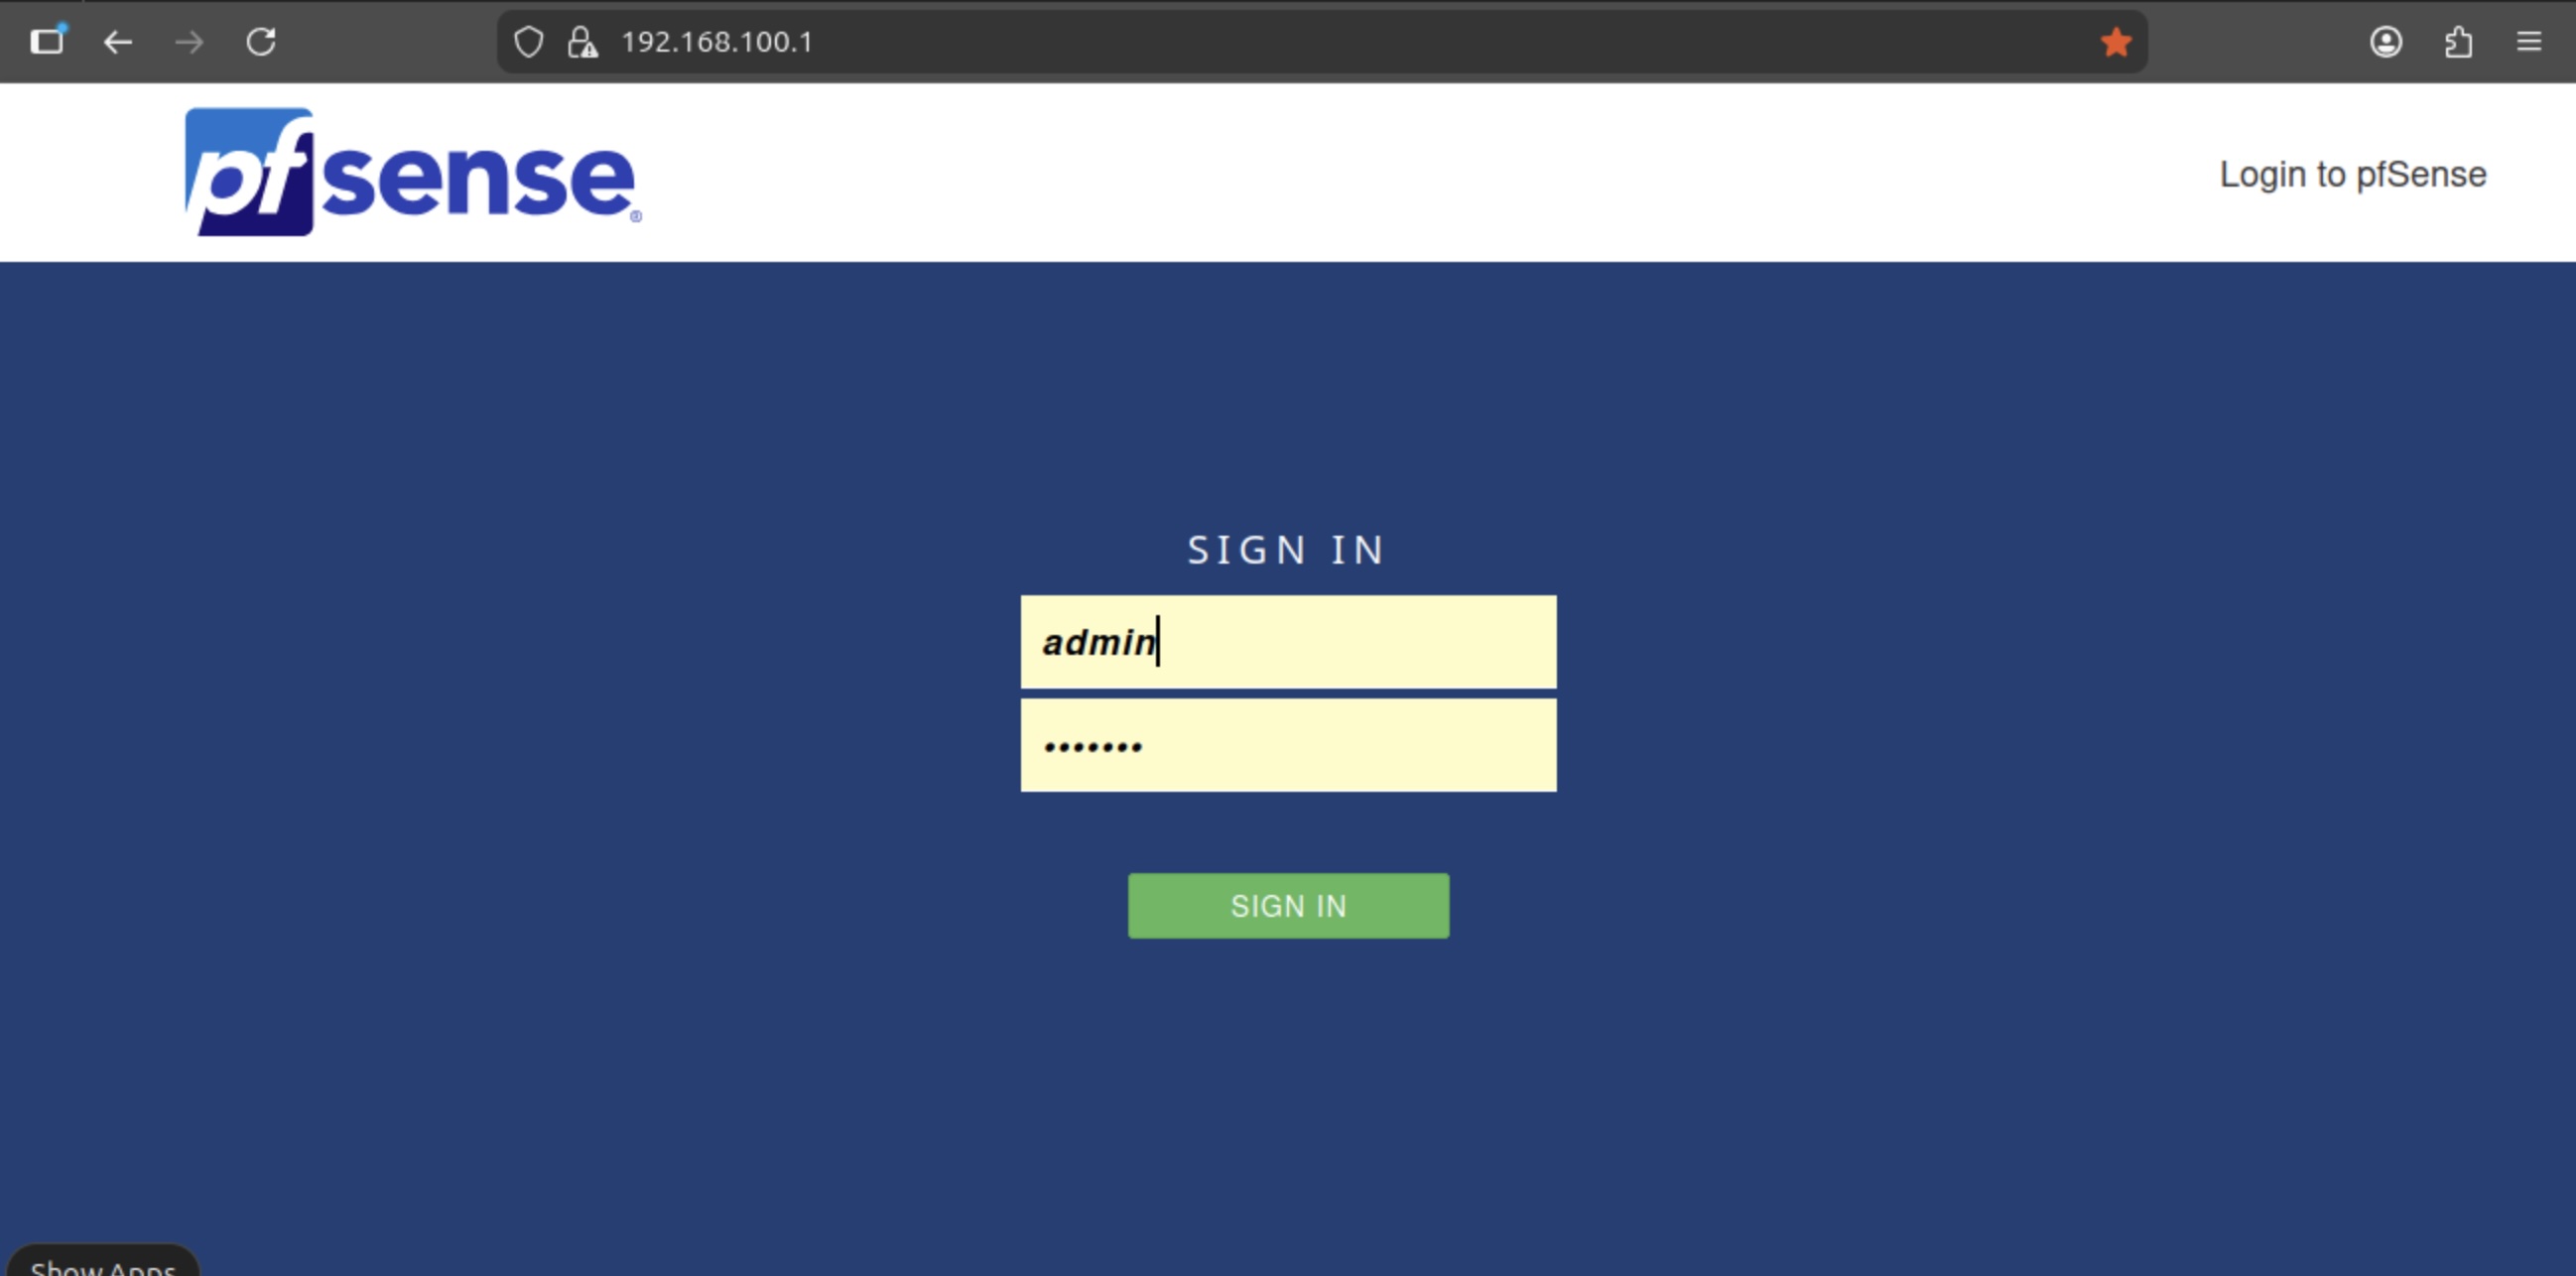
After typing in admin/pfsense you'll be guided through an initial setup process. On the general information screen (step 2 of 9) enter the following information:
- hostname: firewall
- domain: mgmt.lab.internal
- dns: "your internal dns" or 8.8.8.8
On step 4 of 9 (Configure WAN interface) disable the private network block:

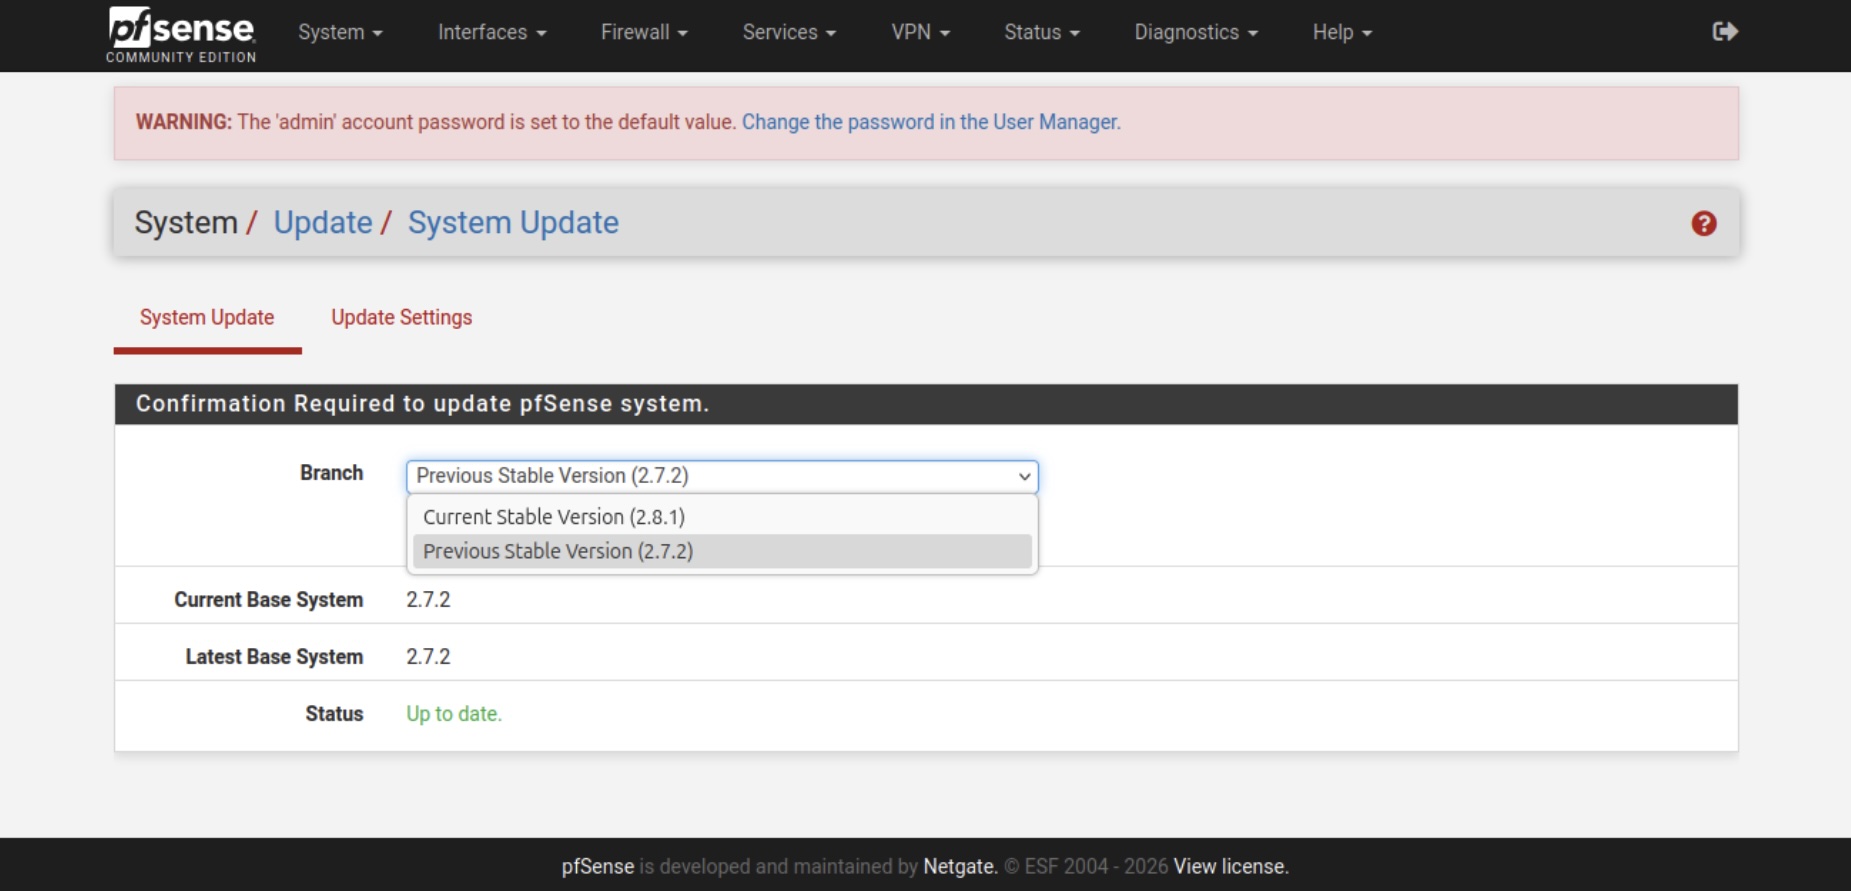
For the rest of the steps the default settings are ok. Before we're configuring the rest of the system update pfSense to the latest version if available. You can do that under System/Update.
Now that we're finished with the initial configuration. It's time to configure the rest of the system so that we're get our lab to work. For this, I've already prepared a ready to use backup file. To install it go to Diagnostics / Backup & Restore and upload the backup file from the GIT repository.
A list of the config change are:
- Proper naming and configuration of all network interfaces
- Activated Kea DHCP server for the lan interfaces
- Activated DNS resolver with static entries for Talos
- Installed and configured FRR package for the BGP config
- FW rules for the whole lab
Please be aware, you have to change the MAC addresses for the static dhcp entries!
If everything went fine you should now be able to ssh into the Registry VM through the ip 192.168.100.11 which we need for the next part to install the internal image registry as well as the Talos Image Factory.
Summary
At the end of this post all VMs (except for the Talos nodes) should be up and running now. We have a management client set up which is reachable from outside Proxmox and can reach the pfSense firewall which is configured too. The registry VM which is in another network can be reached from the management client through ssh.
That's all for now. Stay tuned and leave me a comment on LinkedIn for any problems or suggestions you have.
Related posts:
Highly separated Talos Kubernetes Cluster: Part 1 - Overview
You should also read:

Highly separated Talos Kubernetes Cluster: Part 4 - Talos Cluster installation
In this part, we install Talos on Proxmox VMs, bootstrap the cluster, enable networking with Calico, and prepare HAProxy Ingress in external mode. Before starting, make sure you already read through the other blog posts of this series: Before we can install the Talos cluster…
Continue reading...
Highly separated Talos Kubernetes Cluster: Part 3 - Registry installation
Welcome back to another part of building an highly separated Talos Kubernetes cluster! In this part we will install the internal registry which avoids the direct connection to the internet for the Talos cluster. Furthermore, the Talos image factory will be hosted on premise too,…
Continue reading...
Highly separated Talos Kubernetes Cluster: Part 1 - Overview
Welcome to the overview of a series on building an Talos Kubernetes cluster with enhanced security. This journey will take you through every step, from setting up the initial infrastructure to deploying a fully functional demo application. In this introductory post, we'll discuss why I'm…
Continue reading...